Getting Started with Custom On-Demand SMS Campaigns
Custom On-Demand Campaigns let you promote specific moments like a new menu item, a slow Tuesday, or a holiday special, to exactly the audience you want. The built-in editor lets you launch custom emails and SMS messages in minutes, no design or marketing experience required.
Note: Custom On-Demand Campaigns are available on ChowNow Grow and Elevate plans.
See Also: Getting Started with Custom On-Demand Email Campaigns
How to set up a custom on-demand SMS campaign
Step 1: Create your campaign
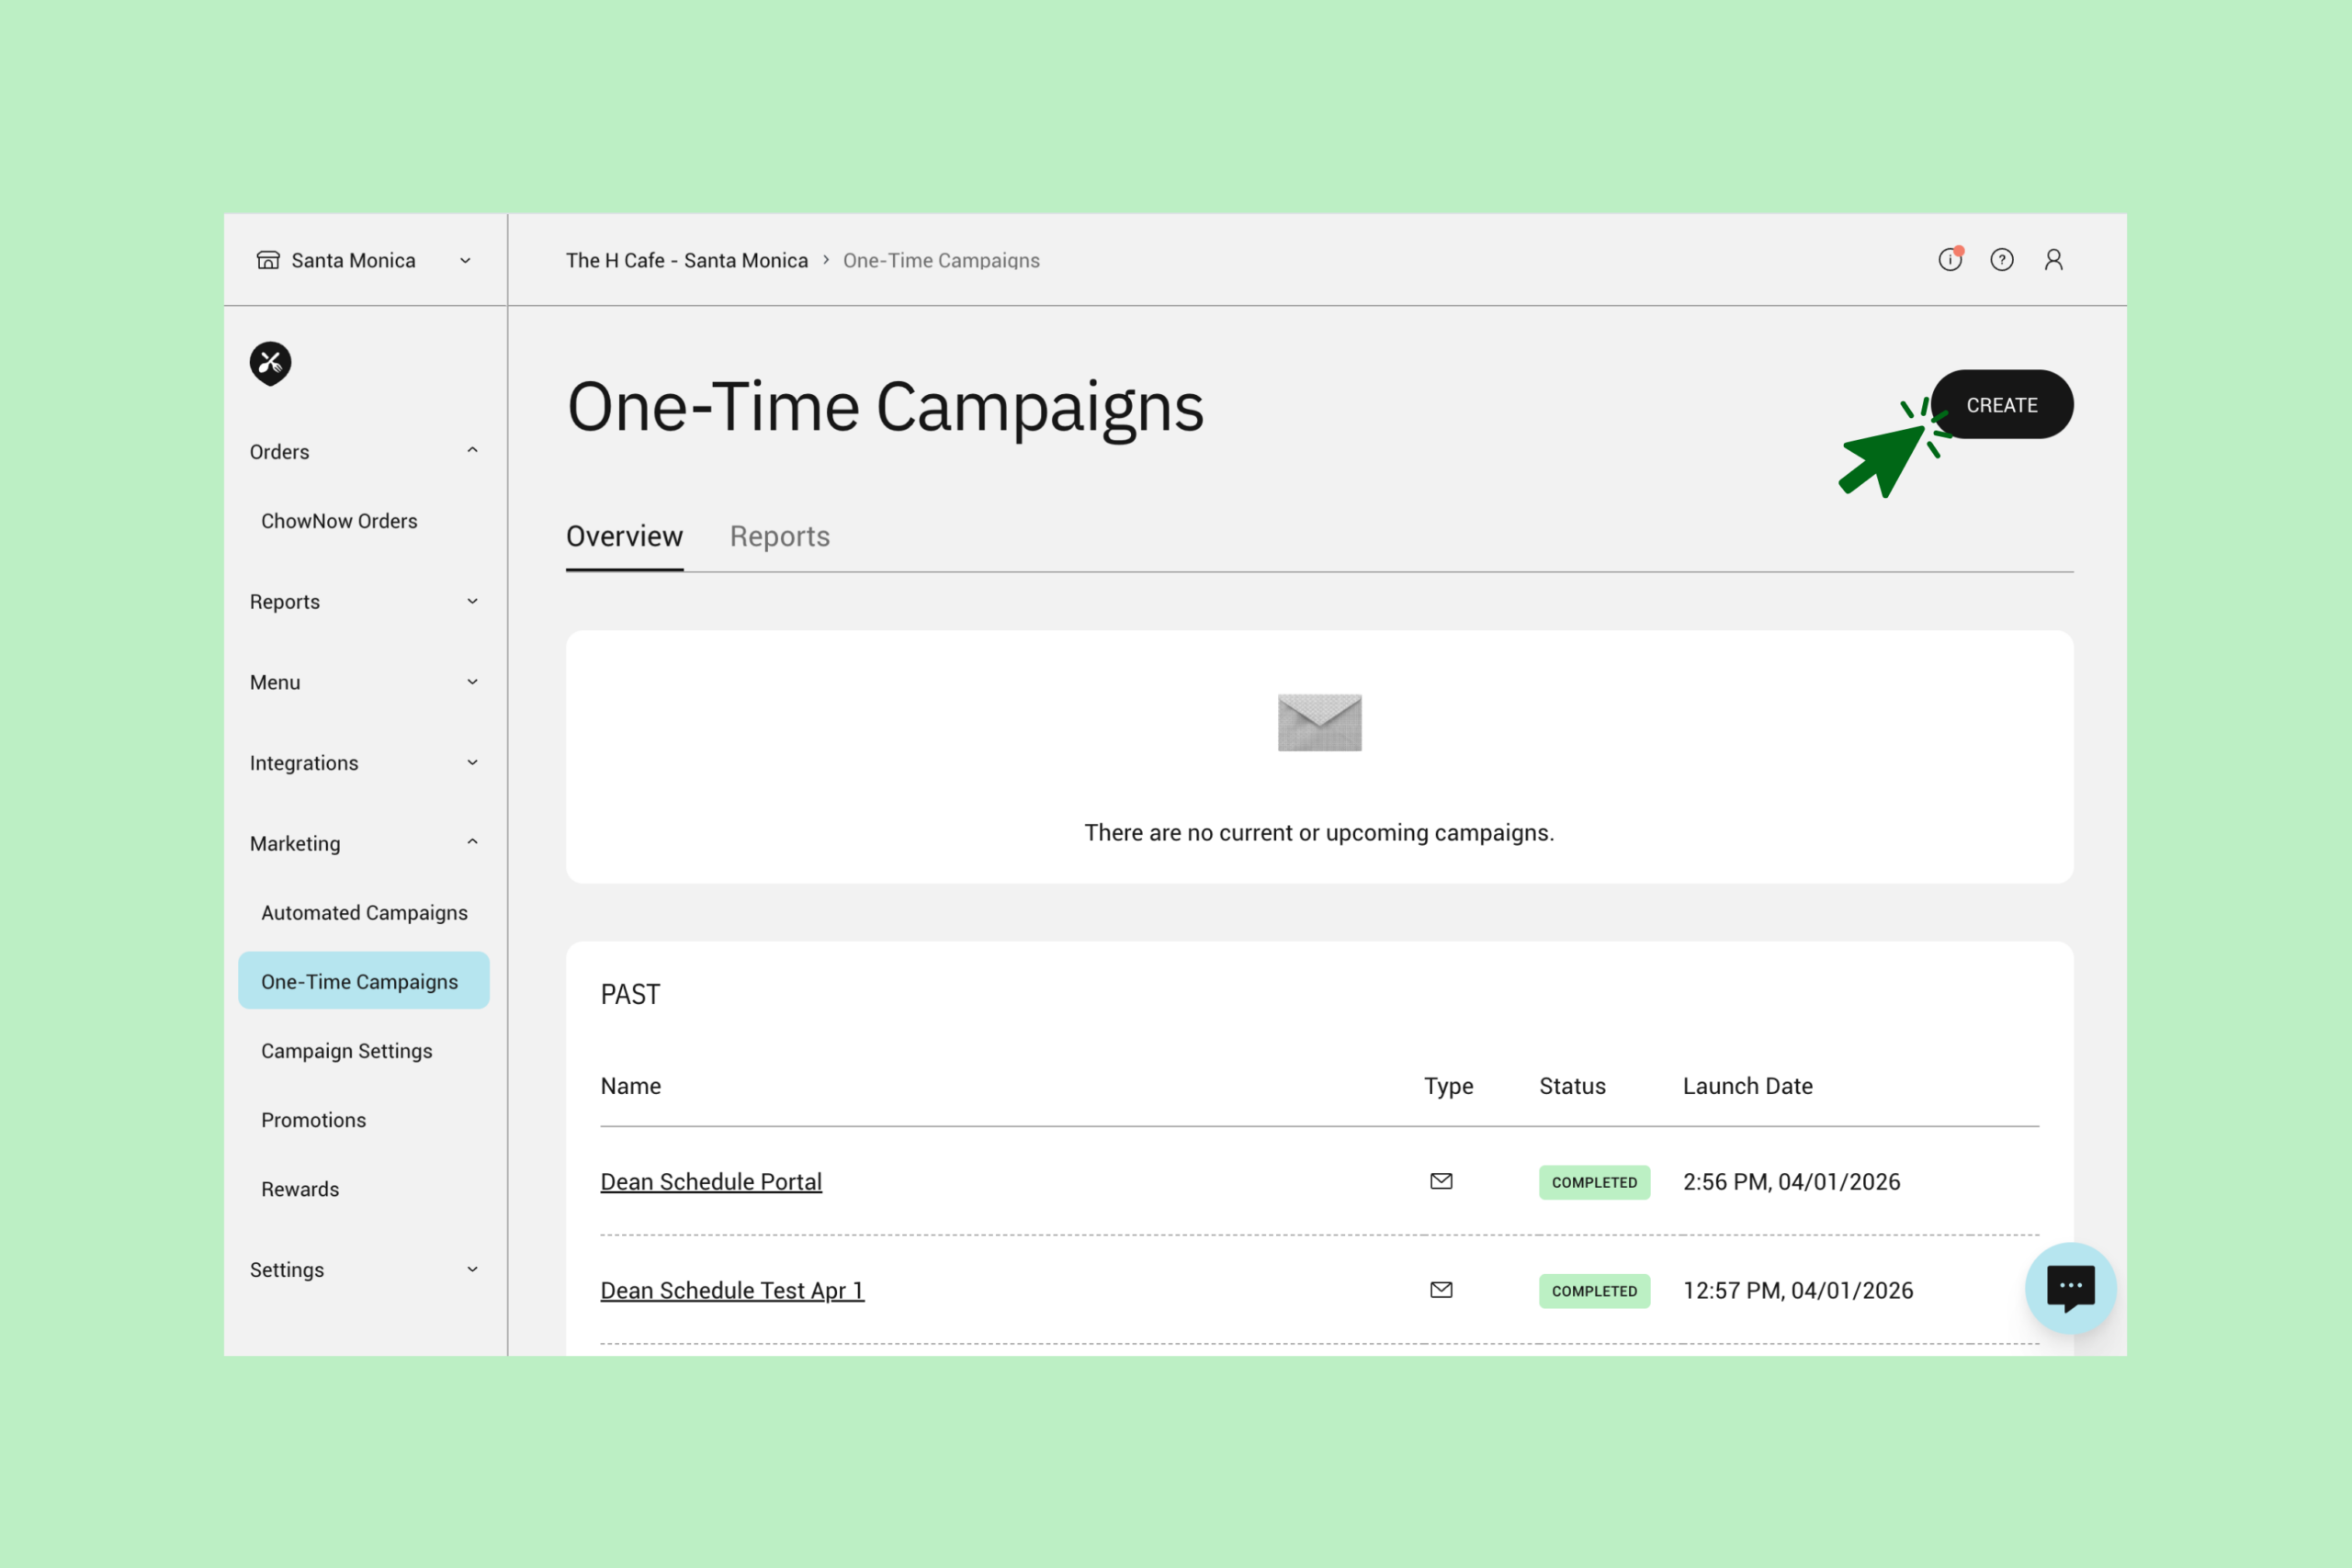
- To start building your campaign, navigate to “Marketing” > “One-Time Campaigns” in your ChowNow Dashboard.
- Select “Create” in the upper right-hand corner, which will take you to the guided campaign builder within your dashboard.
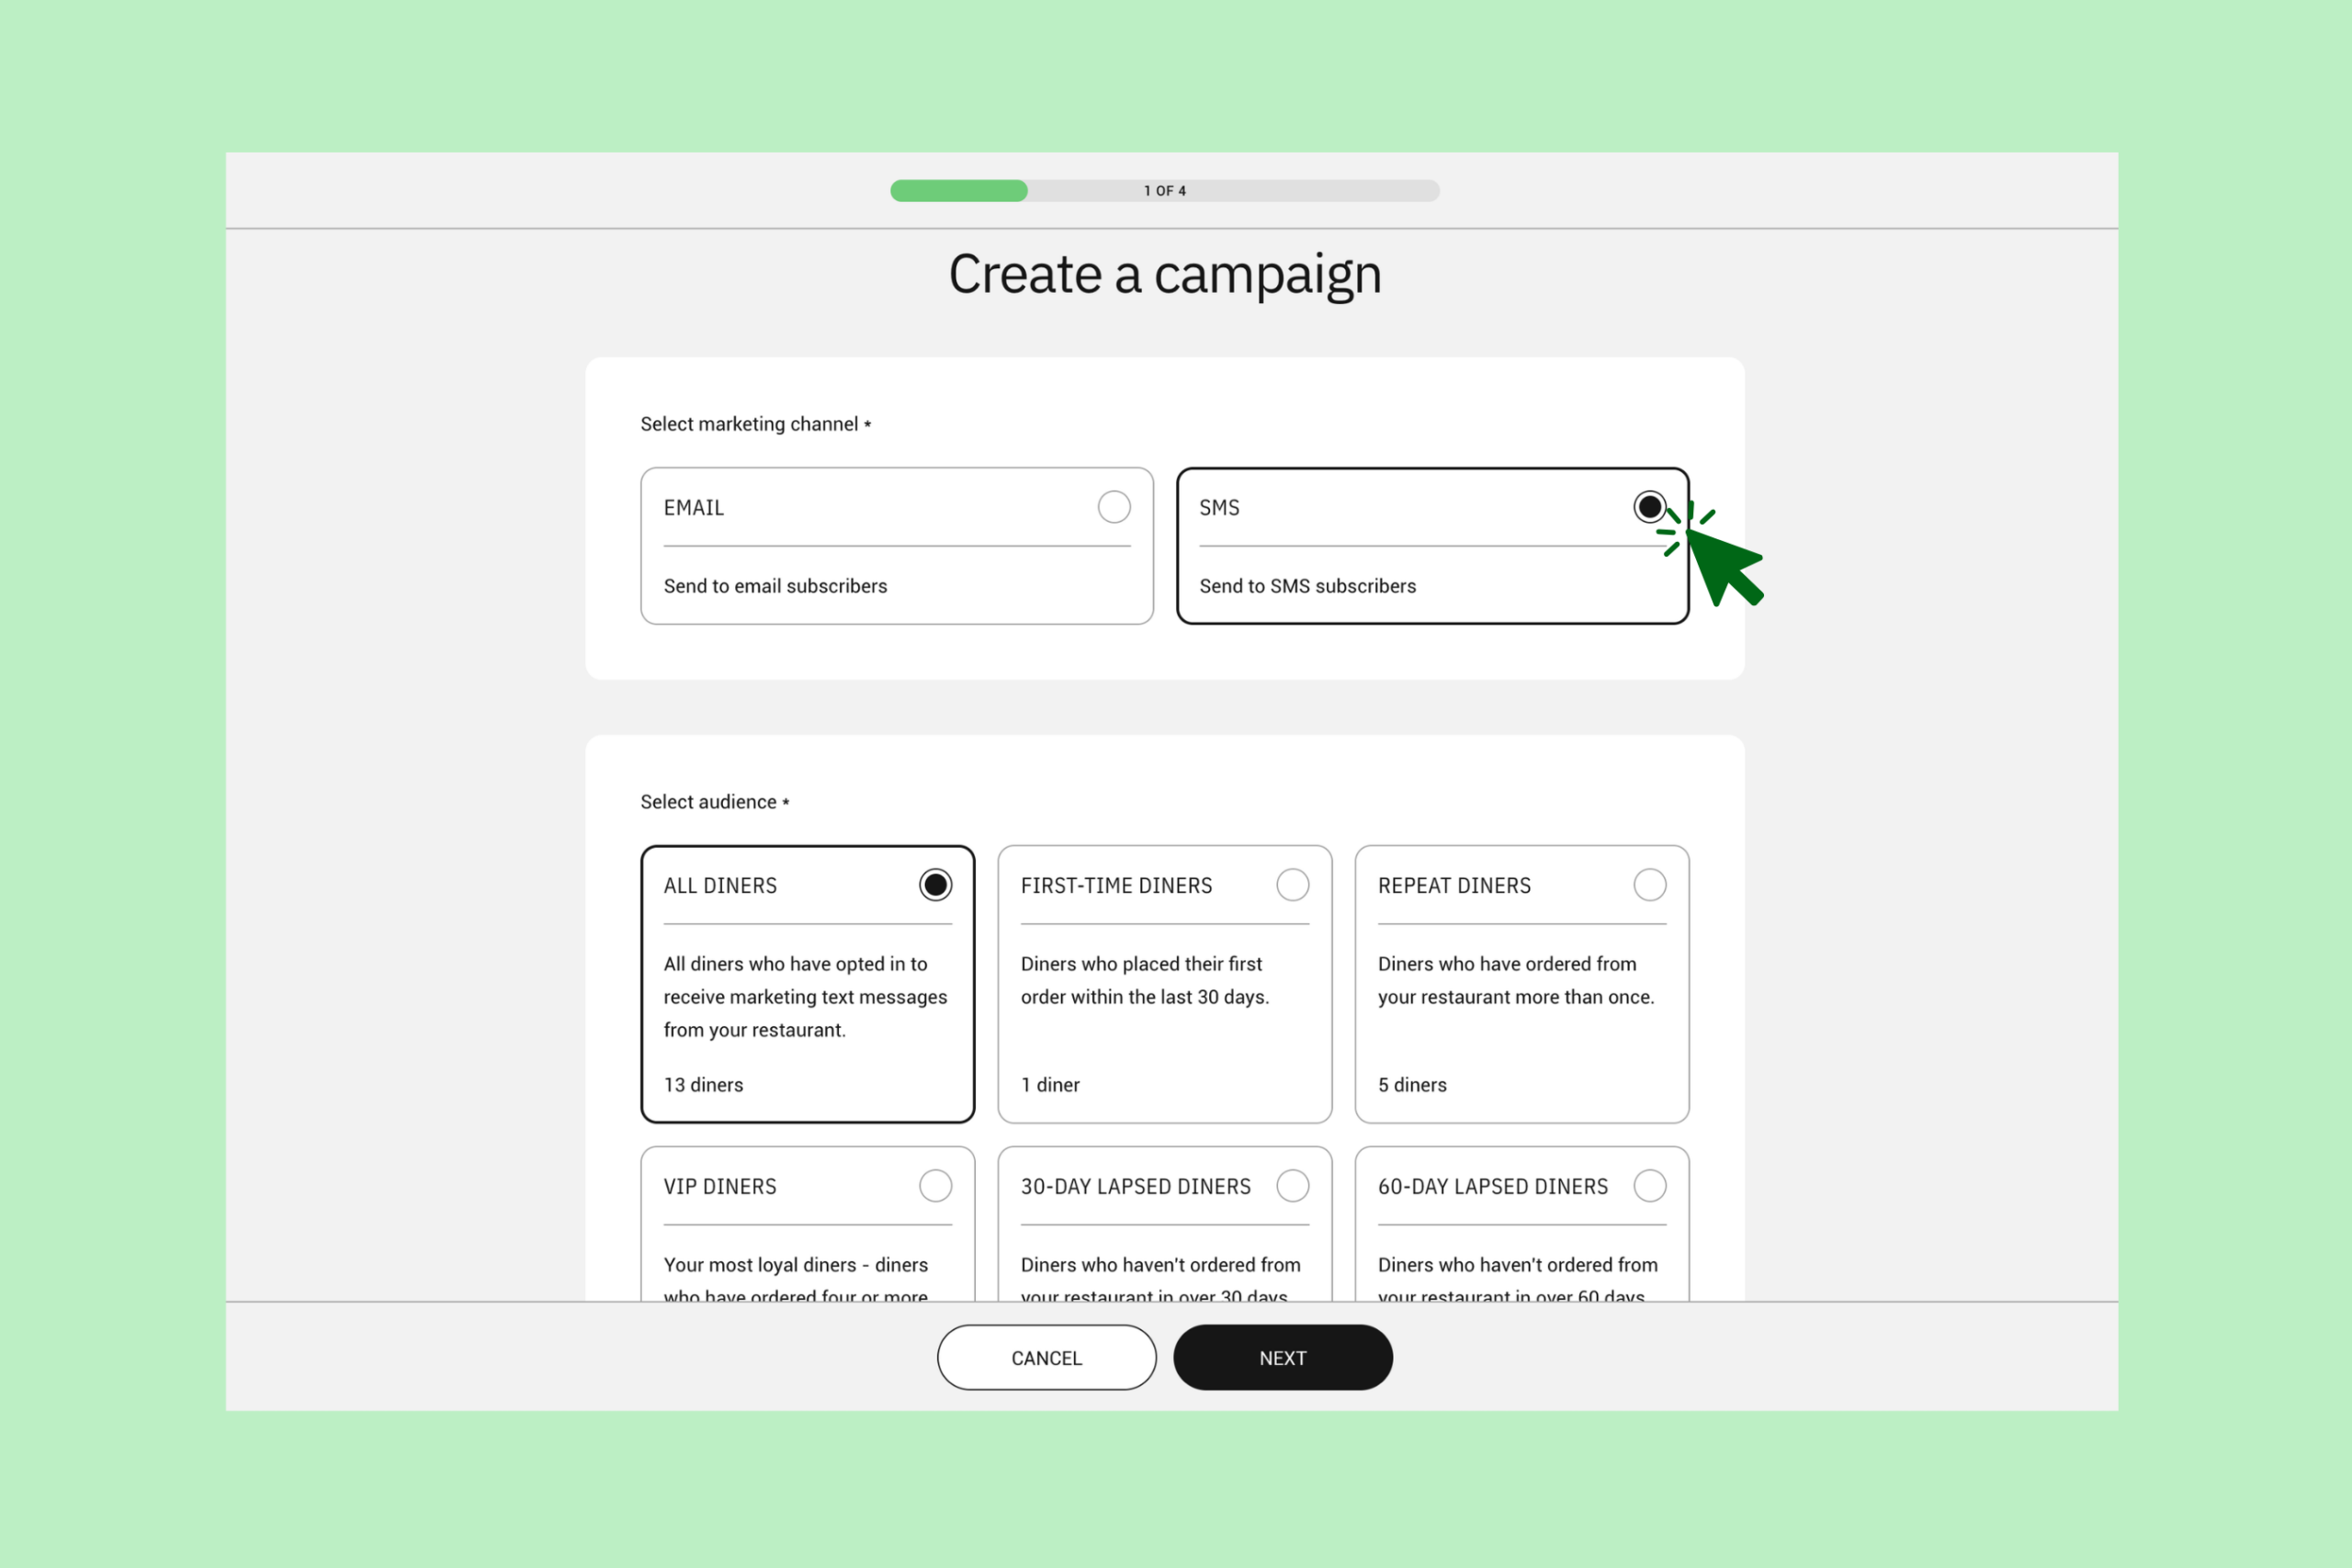
- Select “SMS” as your channel.
- Select your audience from the library of pre-built, lifecycle-based segments, or target your entire marketing list.
- Name your campaign. This is for your internal reference only and won’t be seen by diners.
- Click “Next” to start customizing your template.
See also: For best practices and on-demand campaign guidance, download our Email & SMS Marketing Playbook.
Step 2: Build your SMS
Your SMS template is preloaded with your restaurant’s name, and opt-out directions. The text message preview will update in real time as content is edited.
What you can customize:
- Personalization tags: Personalizing your text, like including a diner’s first name, is a proven way to boost open and click rates. Explore available personalizations by selecting “Personalization Tags” in the upper right-hand corner to see all available options. Copy any tag directly into your content, and it will automatically populate using the information on file.
- Promo: To include a promotion, first make sure the promo code is set up in your dashboard (“Marketing” > “Promotions”). Add the promo details and code directly into your text.
- Call to Action: Every campaign should include a clear call to action. We recommend driving diners to your direct online ordering page, which can be added as a personalization tag.
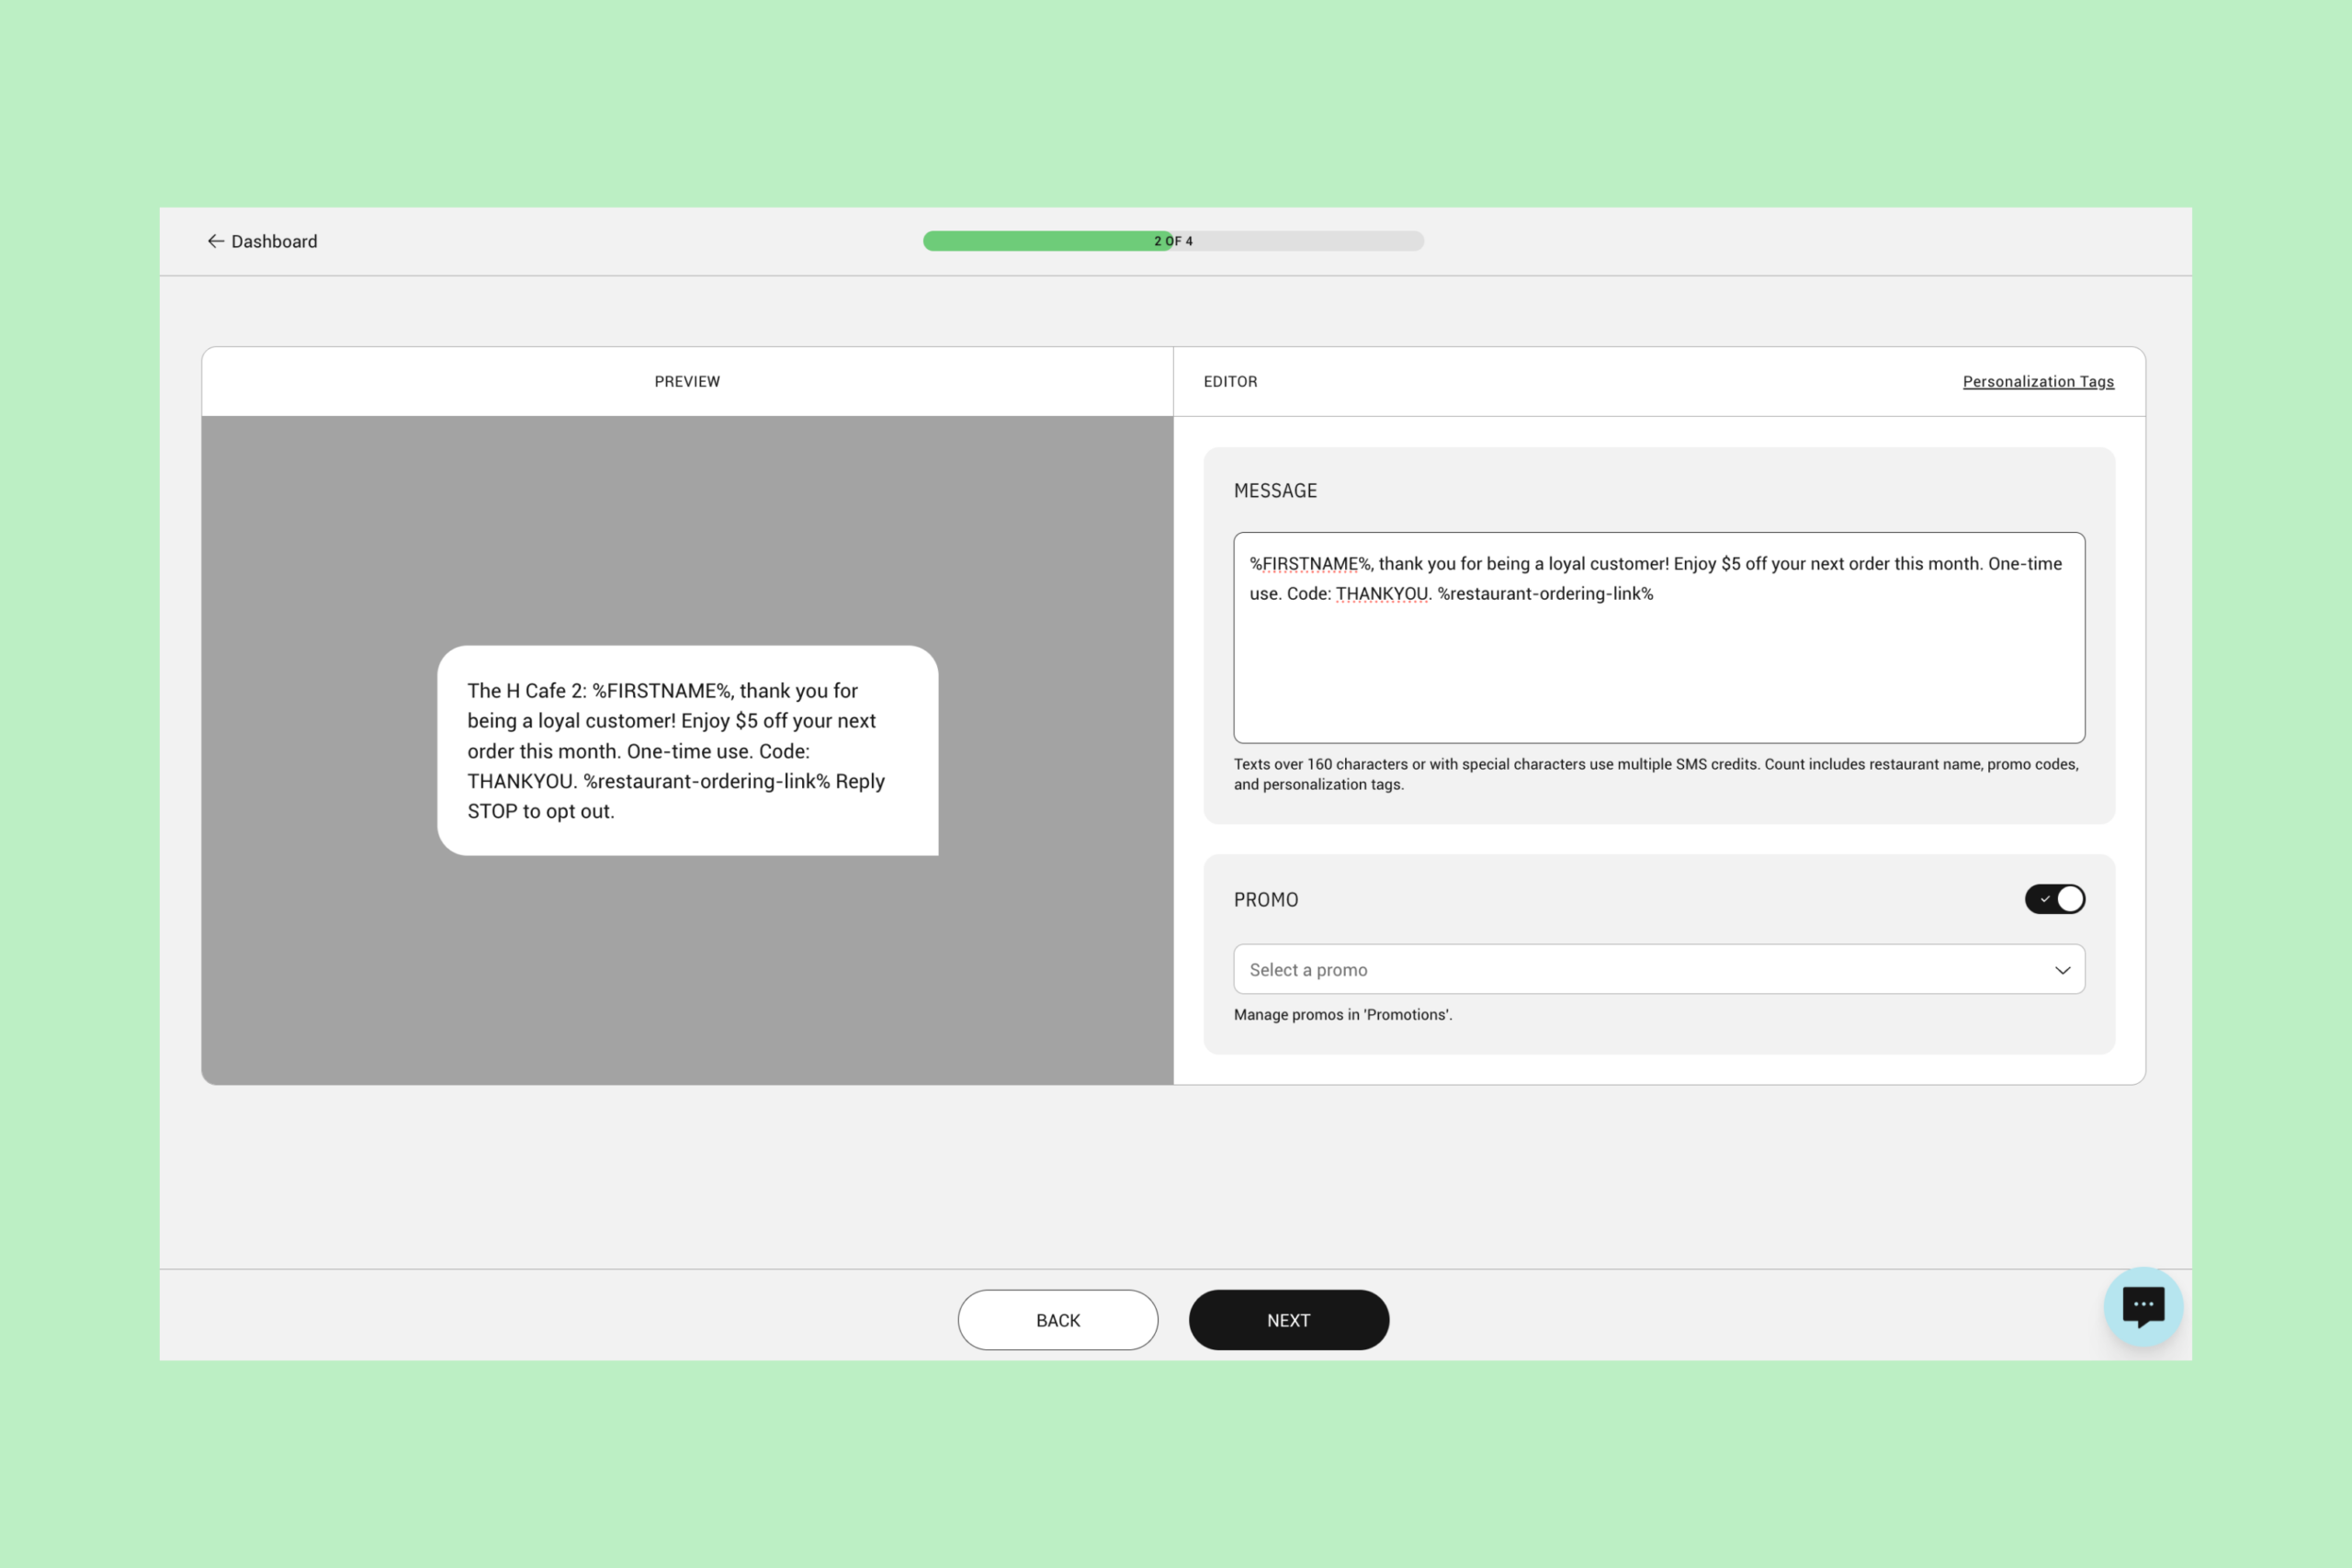
Note: Messages over 160 characters or those using special characters (like emojis) use multiple SMS credits. Learn more about SMS credits and how they work here: Understanding SMS Credits
Step 3: Schedule your campaign
- When your message is ready, click “Next” to open the Campaign Scheduler.
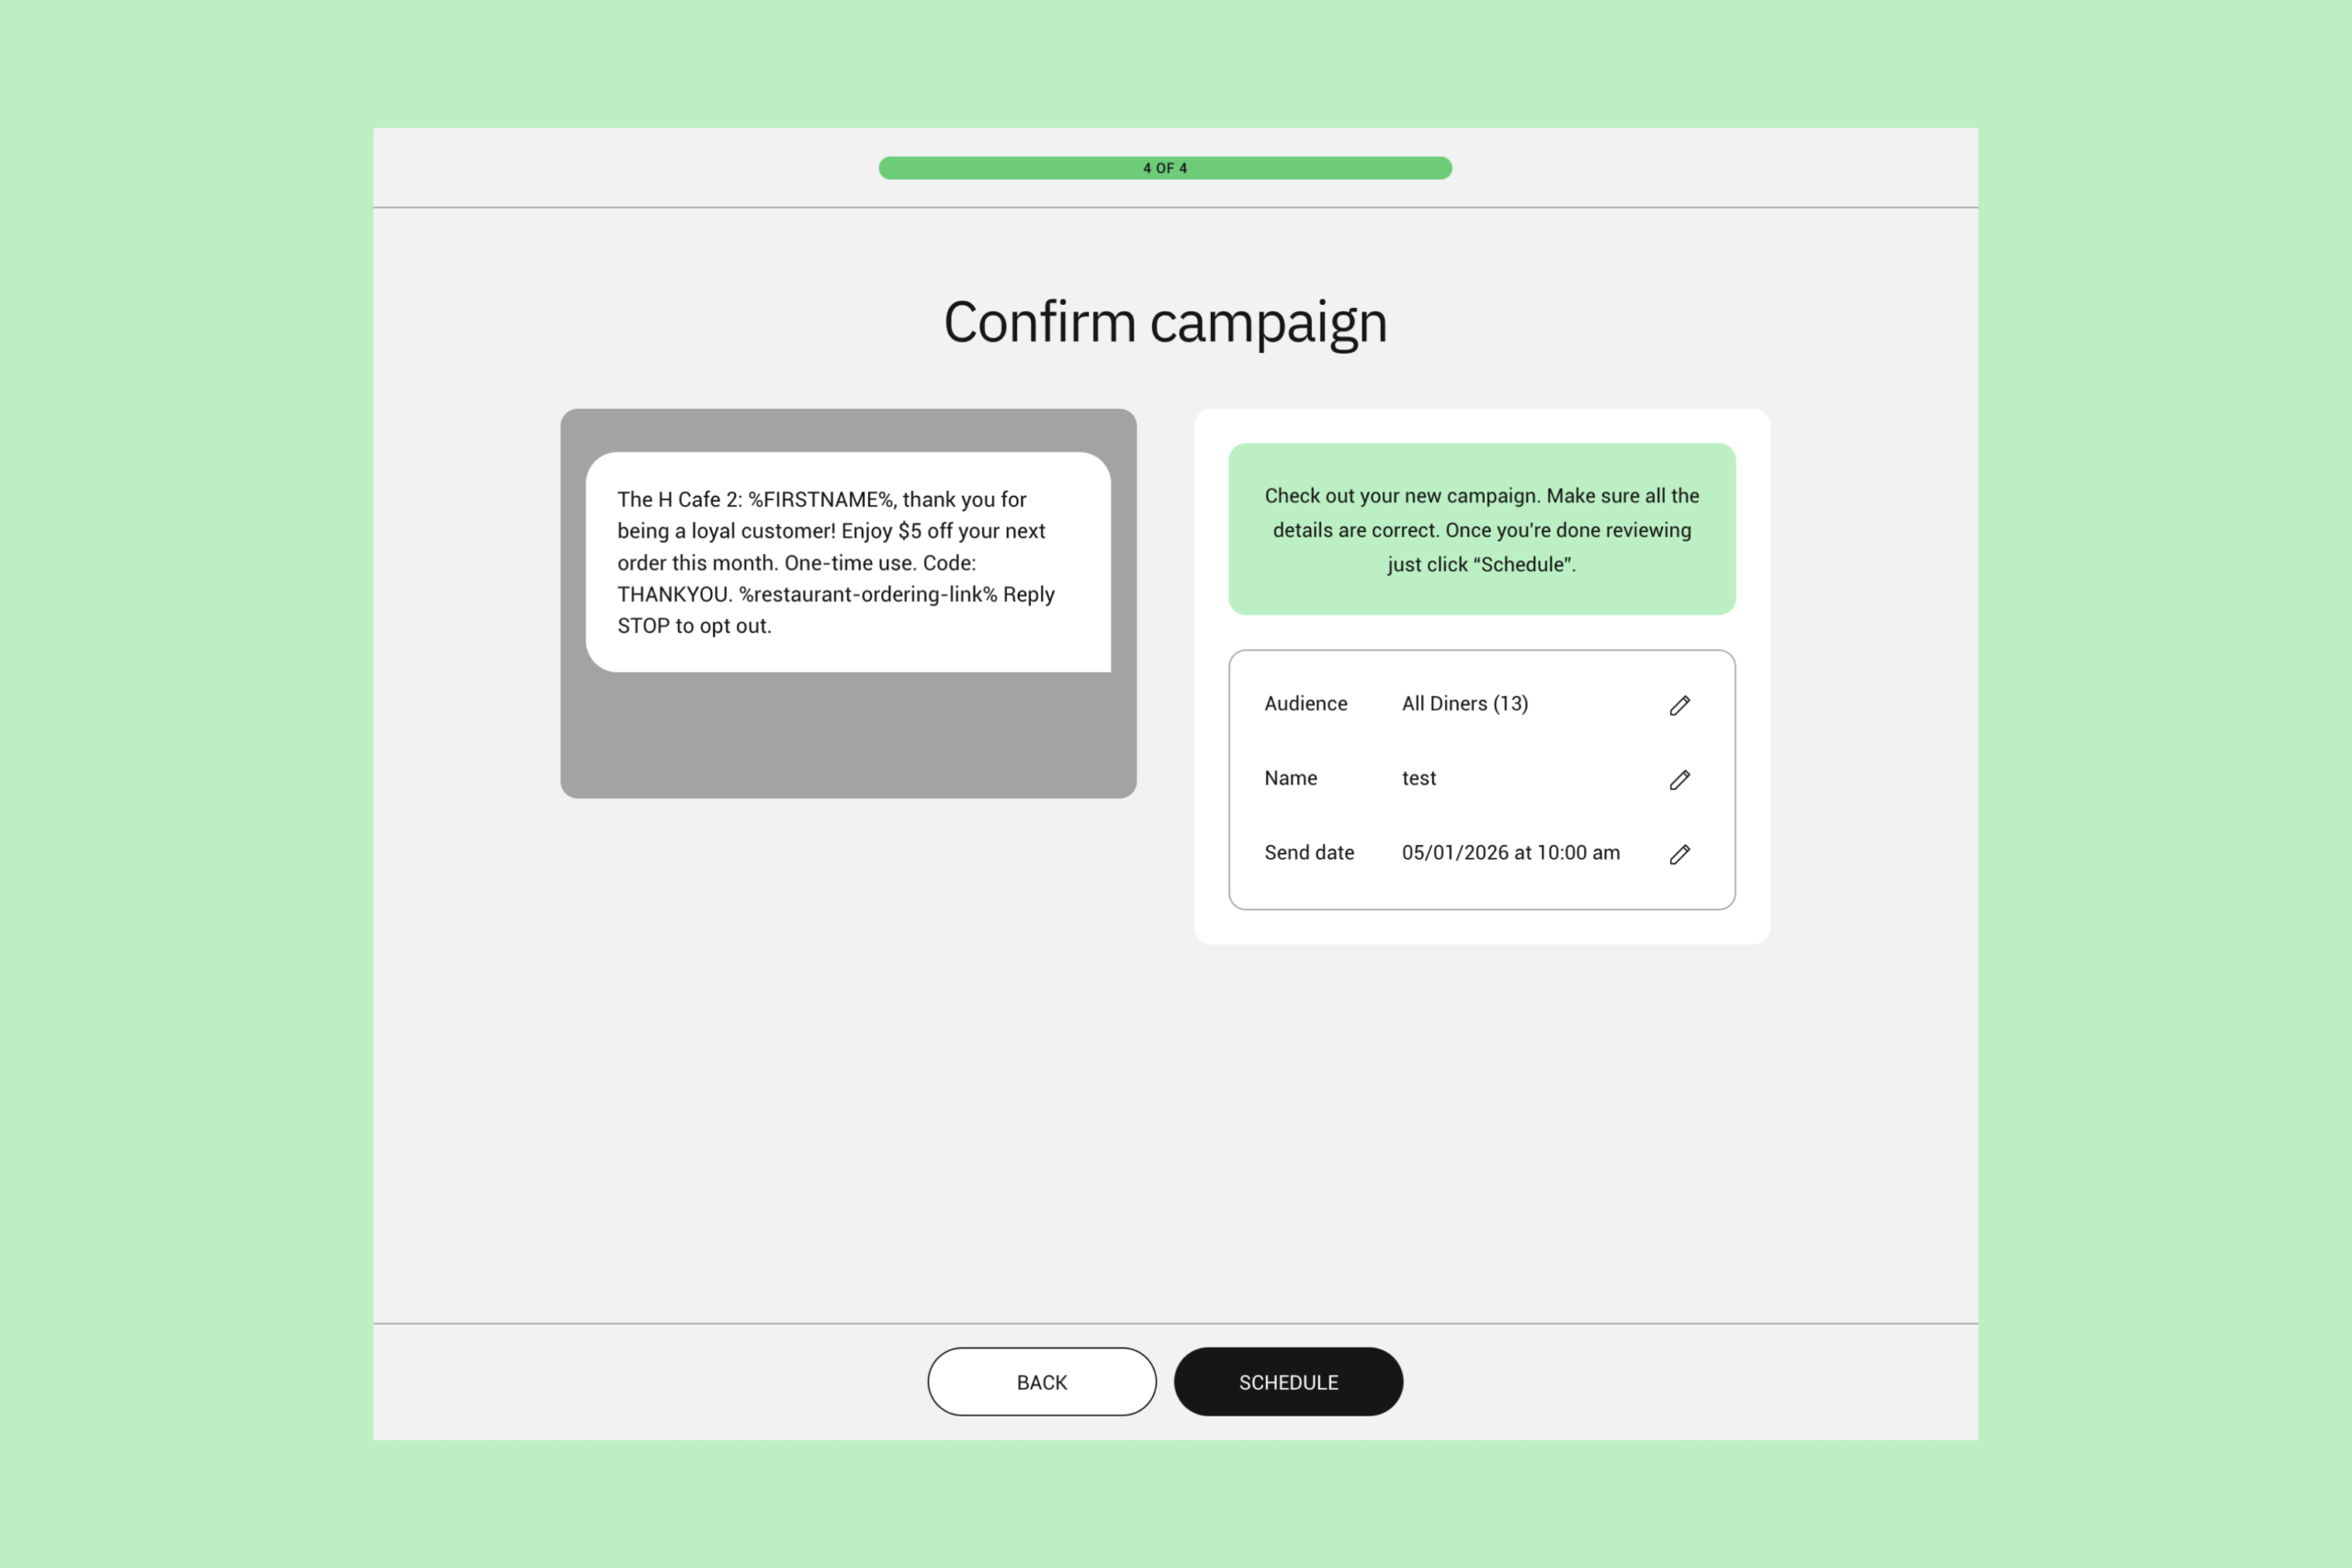
- Schedule your send: Select the date and time your text will go out. We recommend sending close to a meal time or ahead of a busy day. Many restaurants see strong results sending between 10–11am or 4–6pm.
- Click “Next”, confirm all campaign details, then click “Schedule”.
Where to find your scheduled campaigns
Once your campaign is scheduled, it will appear in the “Current and Upcoming” section of the “One-Time Campaigns” Overview page in your dashboard.