How to set up your Square POS Menu for Import
The ChowNow import can pull from the Menus section of your Square Dashboard (recommended), or your Square Item library.
In order to have your Square menu import correctly into ChowNow, please ensure that each Item in your Square Item library is assigned to both a Category and a Reporting category. If you are using Modifier Sets, please ensure that they are properly applied to your Items.
Note: If certain items or modifiers are missing after import, they are likely not configured correctly in your Square POS.
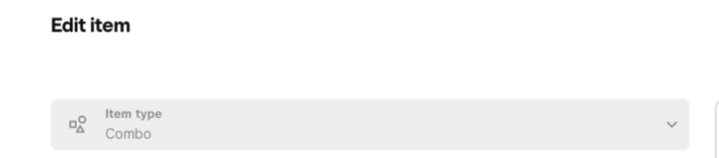
Important: Item type: Combo is not currently supported for import.
Note: If you have items in your Square Item Library that aren’t set up in the Menus section of your Square Dashboard, we recommend adding them there. Square is moving toward Menus as the source of truth for how restaurants organize their menu. Setting this up now will also make future menu edits and imports easier through ChowNow.
For help setting up items and menus in your Square dashboard, please refer to these Square support articles, or review the steps below.
Adding Item Categories and Reporting categories
To add a Category and Reporting category to a single item:
- Sign in to your Square Dashboard and click Items & services (or Items & menus or Items & inventory) and go to Items.
- Click on the selected item from the list.
- Click Select within the Categorization section.
- Tick a Category and Reporting category from the list > click Done.
- Click Save.
To add a Category to multiple items:
- Sign in to your Square Dashboard and click Items & services (or Items & menus or Items & inventory) > Items > Categories.
- Click on the selected item category.
- Click Add items within the Items section.
- Tick the items you want to apply the category to > click Done.
- Click Save.
To add a Reporting category to multiple items:
- Sign in to your Square Dashboard and click Items & services (or Items & menus or Items & inventory) and go to Items.
- Click the Edit Items button.
- On the bulk edit page, click Attributes and ensure a Reporting category is selected.
- Change the Reporting category field to your desired category.
- Click Save.
Adding Modifier Sets
To apply Modifier Sets to a single Item:
- Sign in to Square Dashboard and go to Items & services (or Items & menus or Items & inventory) > Items > Modifiers.
- Select an existing item or Create item.
- Click Add within the Modifiers section.
- Select a modifier set (or several of them) from the list > click Done.
- Click Save.
To apply Modifier Sets to multiple Items:
- Sign in to Square Dashboard and go to Items > Modifiers.
- Click on Apply to items on the relevant modifier set.
- Select the items you want to apply the modifier set to.
- Click Apply to Items.
To apply Modifier Sets to a menu:
You can apply modifier sets to your menu items from the menu editor. Once you apply a modifier set, the modifier set name appears beneath the item name.
- Sign in to Square Dashboard and go to Items > Menus.
- Click Add Modifiers.
- Search for the existing modifier set you want to use.
- Select the display group or individual items to which the modifier will apply.
- Click Apply to Items.
Creating & updating menus
To create a new menu:
When creating a new menu, you have four options for menu creation all from your Square Dashboard:
Option 1: Upload a file or photo of your menu
- Sign in to Square Dashboard and go to Items & services (or Items & menus or Items & inventory) > Menus.
- Click Create a Menu > Upload a file, photo, or URL of your existing menu.
- Select From my computer to import a file from your computer. Select By URL to paste a link to your menu.
- Click Continue.
- Enter a Menu name and select the Location where the menu will apply. Click Continue.
- Square will send you an email when your menu is ready. Most menu builds take under 24 hours.
Option 2: Import your menu from another platform
- Sign in to Square Dashboard and go to Items & services (or Items & menus or Items & inventory) > Menus.
- Click Create a menu > Import your menu from another platform. A WoFlow modal will appear, guiding you through the process of importing files.
- From the list, select your current platform which has your menu data
- Select how you want to import your menu, either by securely signing in or by sharing a public URL.
- Click Continue to sign in.
- Sign in to the platform which has your menu.
- Let your menu and other data be imported.
- Click Continue.
- View your menu and make any edits and then click Approve.
Option 3: Generate a custom starter menu
- Sign in to Square Dashboard and go to Items & services (or Items & menus or Items & inventory) > Menus.
- Click Create a menu > Generate a custom starter menu.
- Answer the questions on menu type, cuisine, and menu size.
- Name your menu and click Continue.
- After viewing the AI-generated result, hit Continue to edit the menu further.
Option 4: Manually create a menu
- Sign in to Square Dashboard and go to Items & services (or Items & menus or Items & inventory) > Menus.
- Click Create a Menu > Build your menu manually.
- Enter a name in the Menu Name field and select the location where the menu will apply.
- Click Save.
- Click Add Item to select existing items from the drop-down menu. Select Add Multiple Items to create new items and add them to the menu.
- Enter an Item Name, a Kitchen Facing Name, and an Item Price.
- Click Create Items > Done to add the items to your menu.
To update your menu:
You can manually update a menu from your Square Dashboard, the Square POS app with full service, quick service, or bar mode enabled, or from the Square Restaurants POS app.
- Sign in to Square Dashboard and go to Items & services (or Items & menus or Items & inventory) > Menus.
- Select one of your existing menus. From this edit page, you can:
- Click the three dots and click Edit menu to change the menu name and update the locations where the menu applies.
- Click Edit POS Layout to update the item grid that is displayed on your POS devices.
- Click Add to add items, menu groups, or modifiers to your menu.
- When prompted, click Save after you apply your edits.
- You can update your menu in bulk from your Square Dashboard. Select multiple menu items and click Edit to update the item name, price, description, modifiers, menu group(s), categories, reporting categories, locations, or sales channels.
Creating a menu group
You need at least one existing menu to create a menu group.
Step 1: Create a menu group
You can create a menu group from your Square Dashboard.
- Sign in to Square Dashboard and go to Items & services (or Items & menus or Items & inventory) > Menus.
- Select a menu from the Menu options.
- Click Add Menu Group.
- Enter a name for your menu group and add items individually or from an existing item category.
- Click Save.
Step 2: Edit your menu group
You can edit menu group details such as location, channel, and availability on Square Dashboard.
- Sign in to Square Dashboard and go to Items & services (or Items & menus or Items & inventory) > Menus.
- Select the menu with the menu group you want to edit.
- Click the three dots next to the menu group you want to edit.
- Select Edit menu group details to edit the menu group name, parent menu group, or items assigned to the menu group.
- Select Add a subgroup to create a menu group within the original menu group.
- Select Add items to add or remove items from the menu group. You can create new items, search by name, filter by category, menu, location, visibility, or inventory.
Add menu groups to your menu
You can add additional structure to your menu by creating menu groups. A menu group, formerly known as a display group, is a group of items that can be added to more than one menu. These groups of items can help your customers navigate your menu.
- Sign in to Square Dashboard and go to Items & services (or Items & menus or Items & inventory) > Menus.
- Select a menu > click Add Menu Group and create a new menu group or select an existing one.
- Select Add image to upload an image that will be displayed on the POS grid layout for the menu group.
- Select Add Items and choose the items you want within the menu group.
- Click Save.