How to Import or add a new Menu
The menu editor in your ChowNow Dashboard gives you three ways to create a new menu:
- Import from a third-party source: if you use a POS system or delivery app, pull your menu in directly
- Generate from an existing file or image: if you have an existing menu file (PDF or image), upload it to the Smart Menu Builder and let ChowNow generate your menu automatically
- Build from scratch: add categories, items, and modifiers manually
Option 1: Import menu from a third-party source
If you use a compatible POS system or delivery app, you can import your menu directly into the menu editor in your ChowNow Dashboard. This is the fastest path and keeps your POS as the source of truth for future updates.
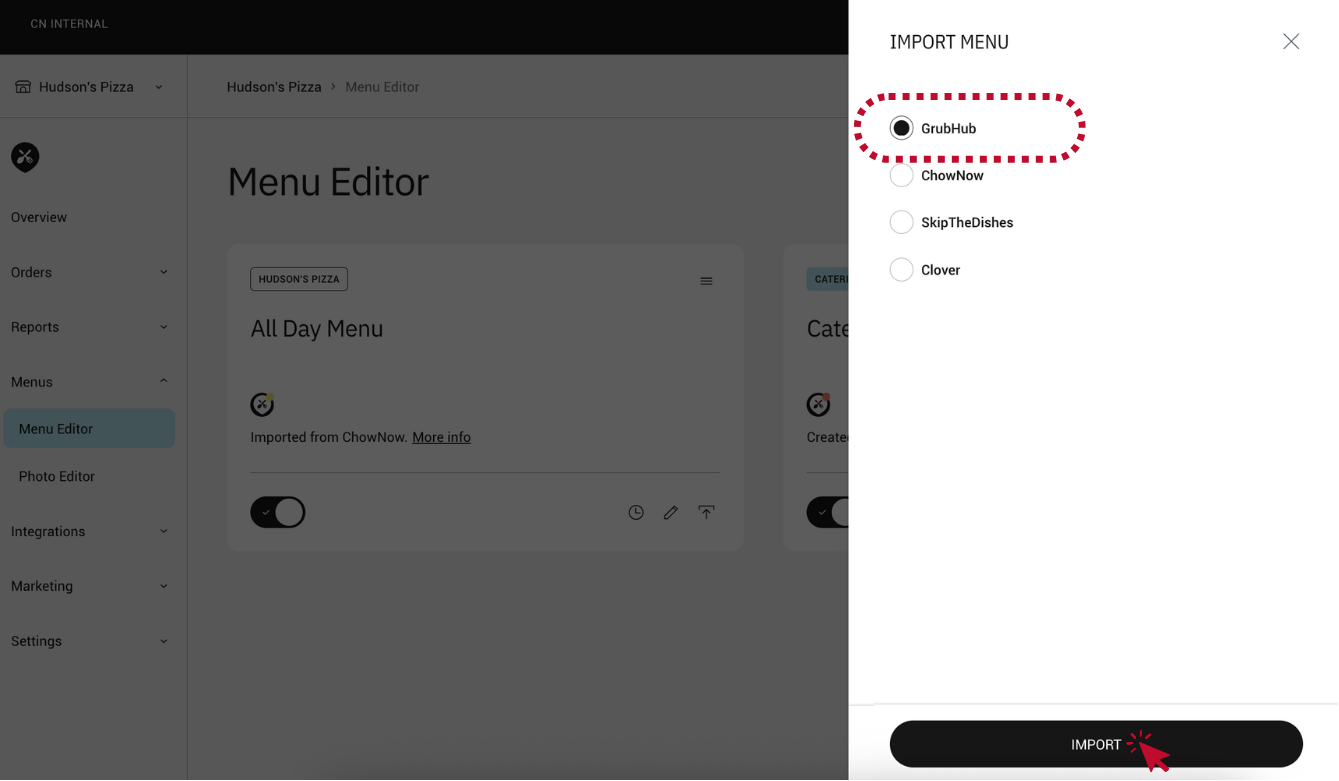
Currently supported sources include: DoorDash, UberEats, SkipTheDishes, Grubhub, Ritual, Square POS, Auphan POS, Revel POS, Clover POS, Givex POS, Volante POS, Universal POS, Lightspeed-K POS, SkyTab POS.
To import a menu:
- Navigate to the menu editor in your ChowNow Dashboard.
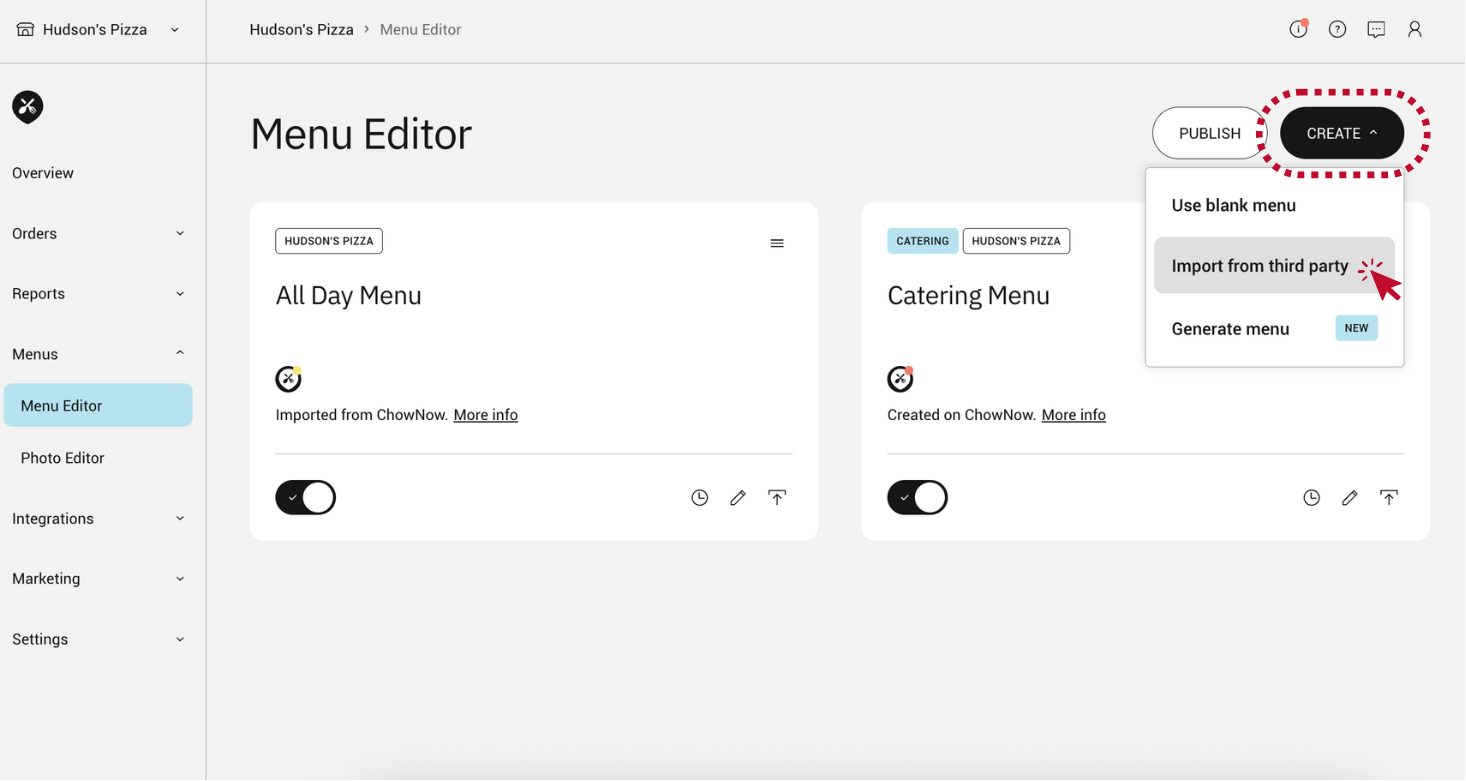
- Select the correct merchant if you have more than one. Click CREATE > Import from third party.
![]()
- Select the menu you’d like to import and click IMPORT.
![]()
Option 2: Generate from an existing file
If you have an existing menu as a PDF, JPG, or PNG, the Smart Menu Builder can read it and automatically generate your ChowNow menu for you.
The Smart Menu Builder creates a draft menu with categories, items, descriptions, pricing, and modifiers that you can review and edit before publishing.
Accepted file types: PDF, JPG, PNG (up to 20MB)
To use the Smart Menu Builder:
- Navigate to the menu editor in your ChowNow Dashboard.
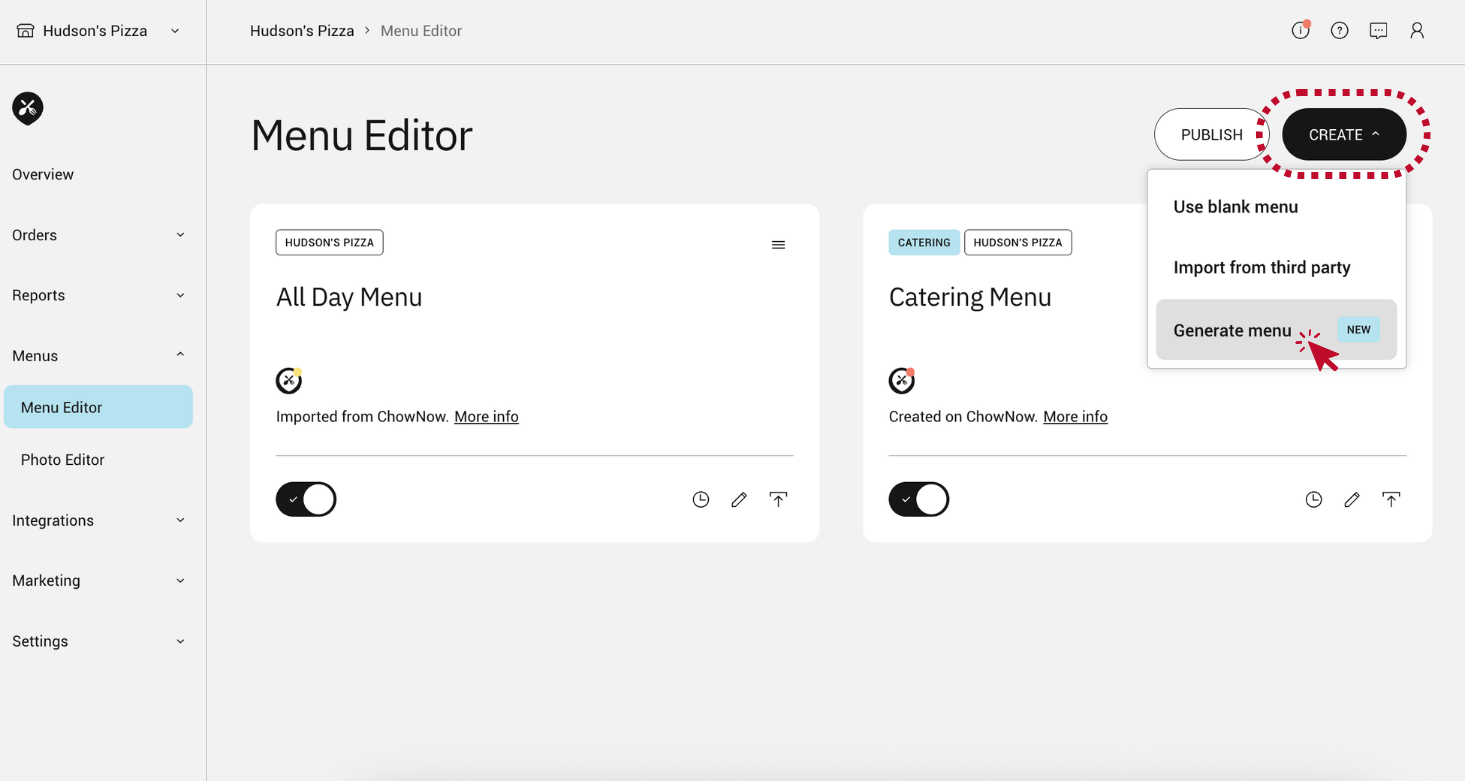
- Select the correct merchant if you have more than one, and click CREATE > Generate a menu.
![]()
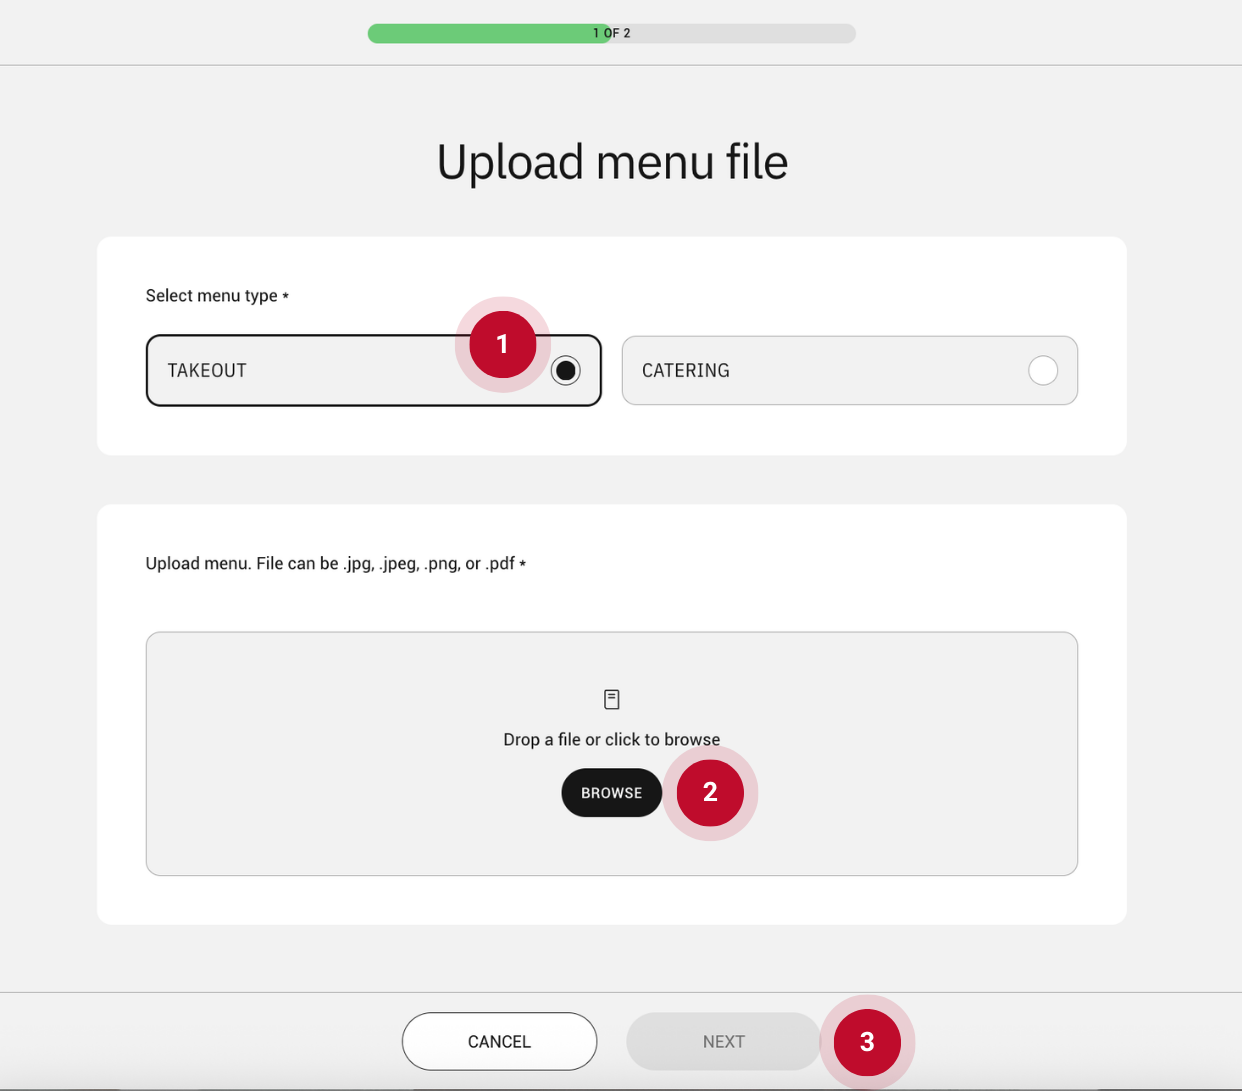
- Choose whether you’re creating a Takeout or Catering menu.
- Upload your file and click NEXT.
![]()
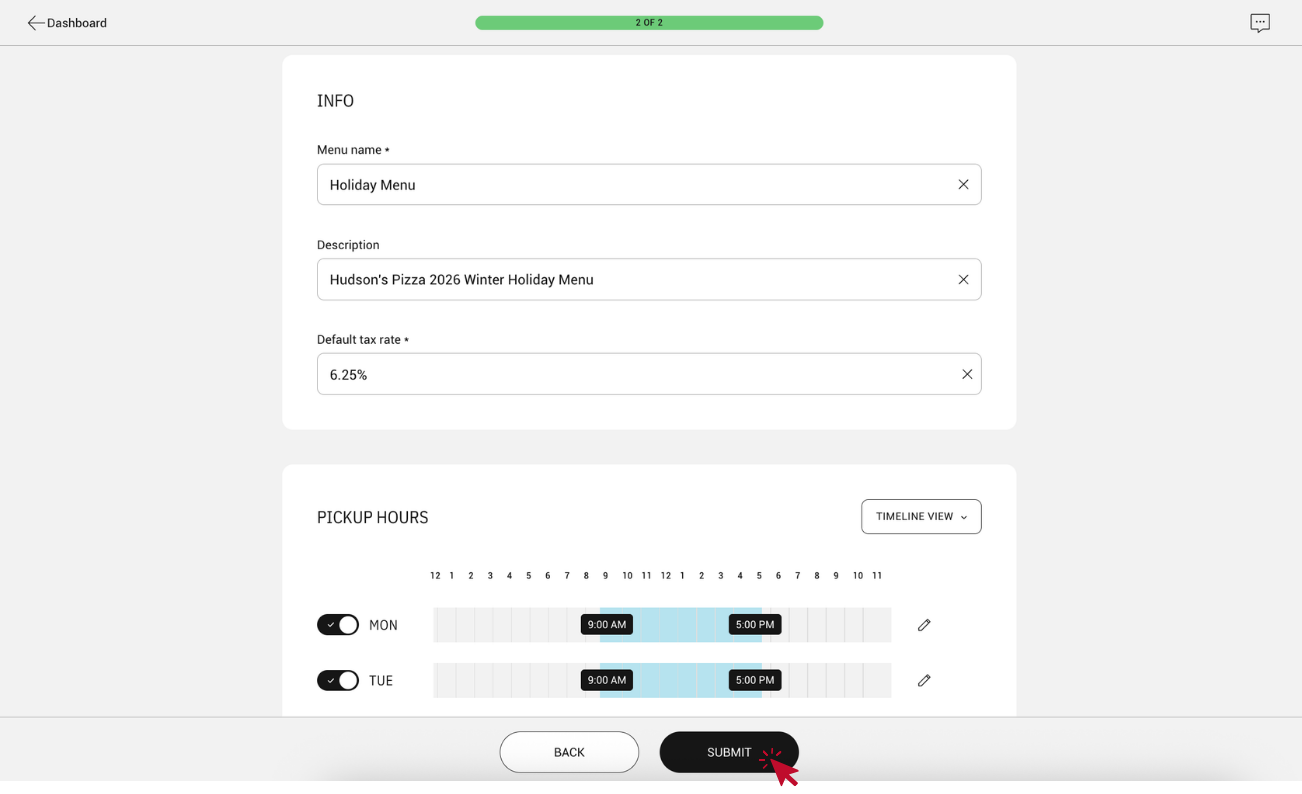
- Enter your menu name, default tax rate, and hours, then click SUBMIT.
![]()
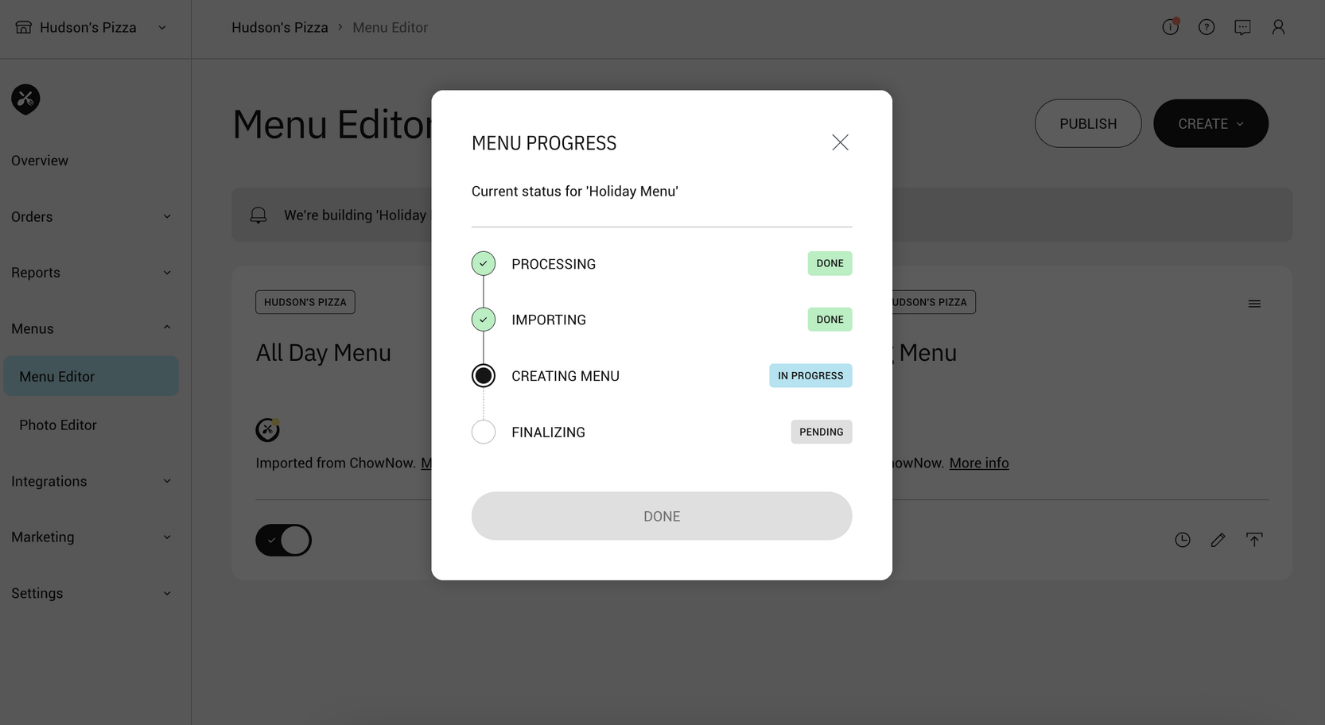
- A progress tracker will appear, where you can track menu creation. We recommend you do not navigate away or close the tab during processing.
![]()
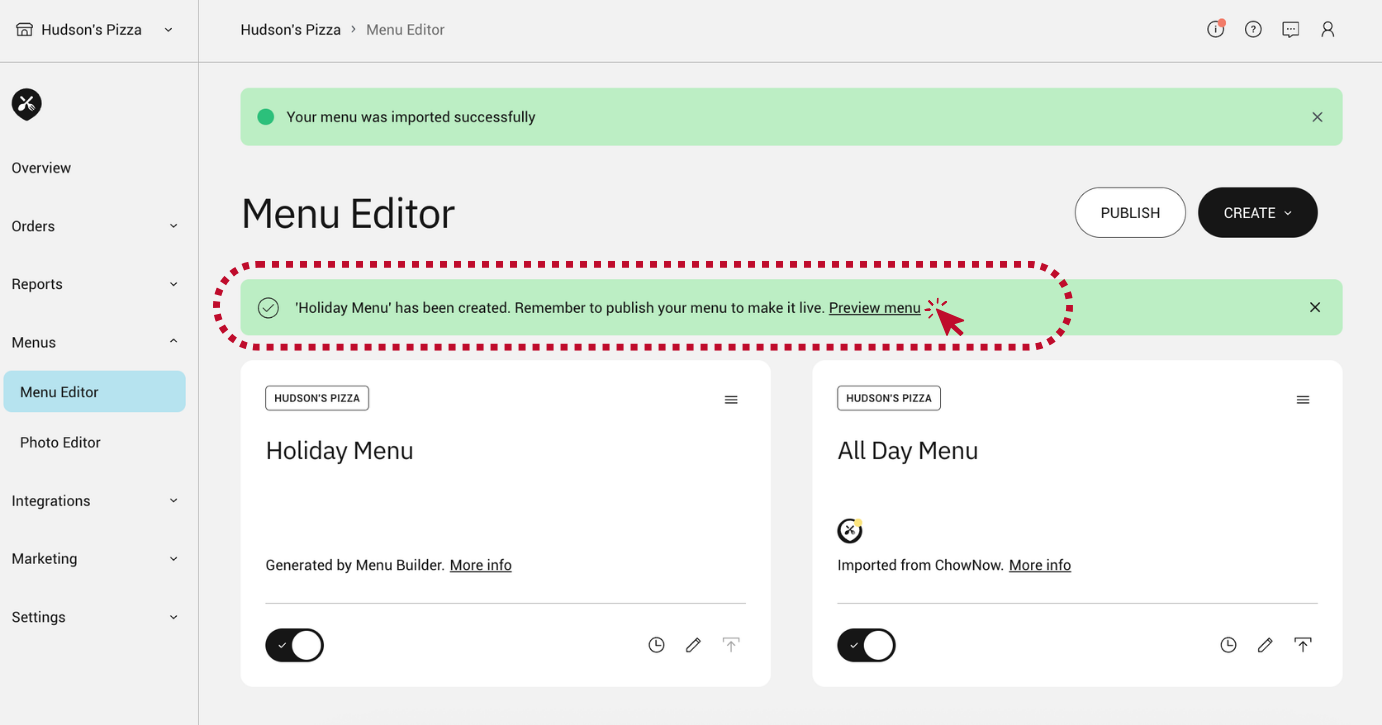
- Once your menu is generated, click Preview menu to review it.
![]()
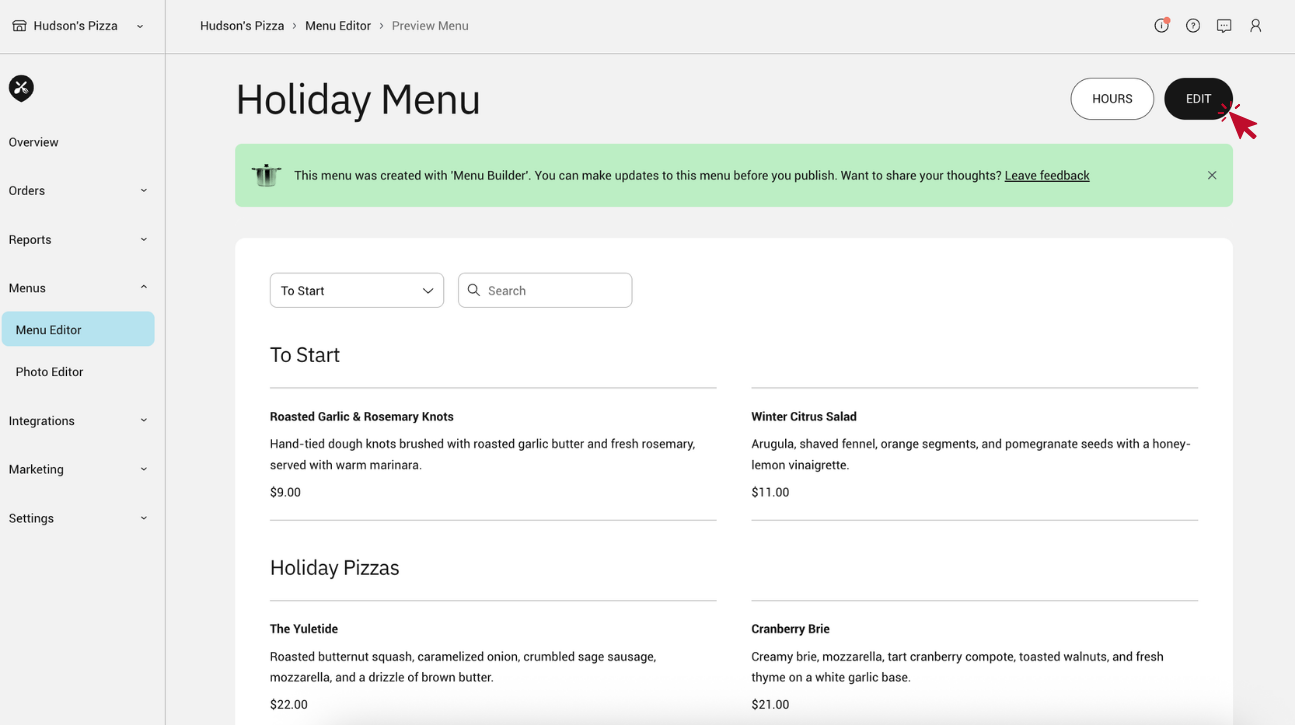
- Edit as needed, then publish when ready.
![]()
A few things to know:
- The Smart Menu Builder works best with clear, legible files. Blurry or low-contrast images may result in incomplete generation.
- Photos are not pulled in from your uploaded file. You can add item photos after your menu is generated. See How do I add, replace, or remove a menu photo? for instructions.
Option 3: Build from scratch
If you’re starting without an existing menu file or integration, you can build your menu manually by adding categories, items, modifier groups, and modifiers directly in the menu editor in your ChowNow Dashboard.
To create a new menu from scratch:
- Navigate to the menu editor in your ChowNow Dashboard.
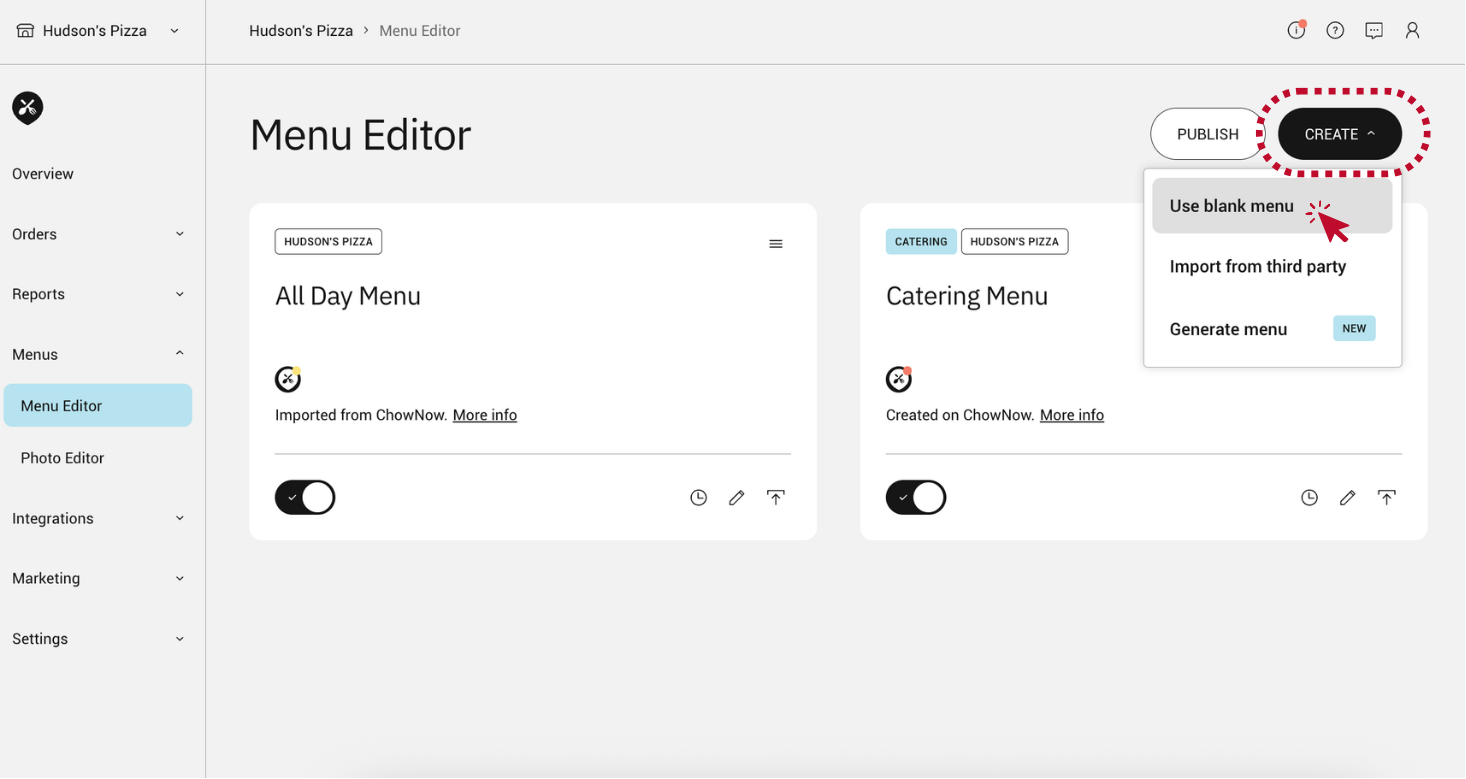
- Select the correct merchant if you have more than one, and click CREATE > Use blank menu.
![]()
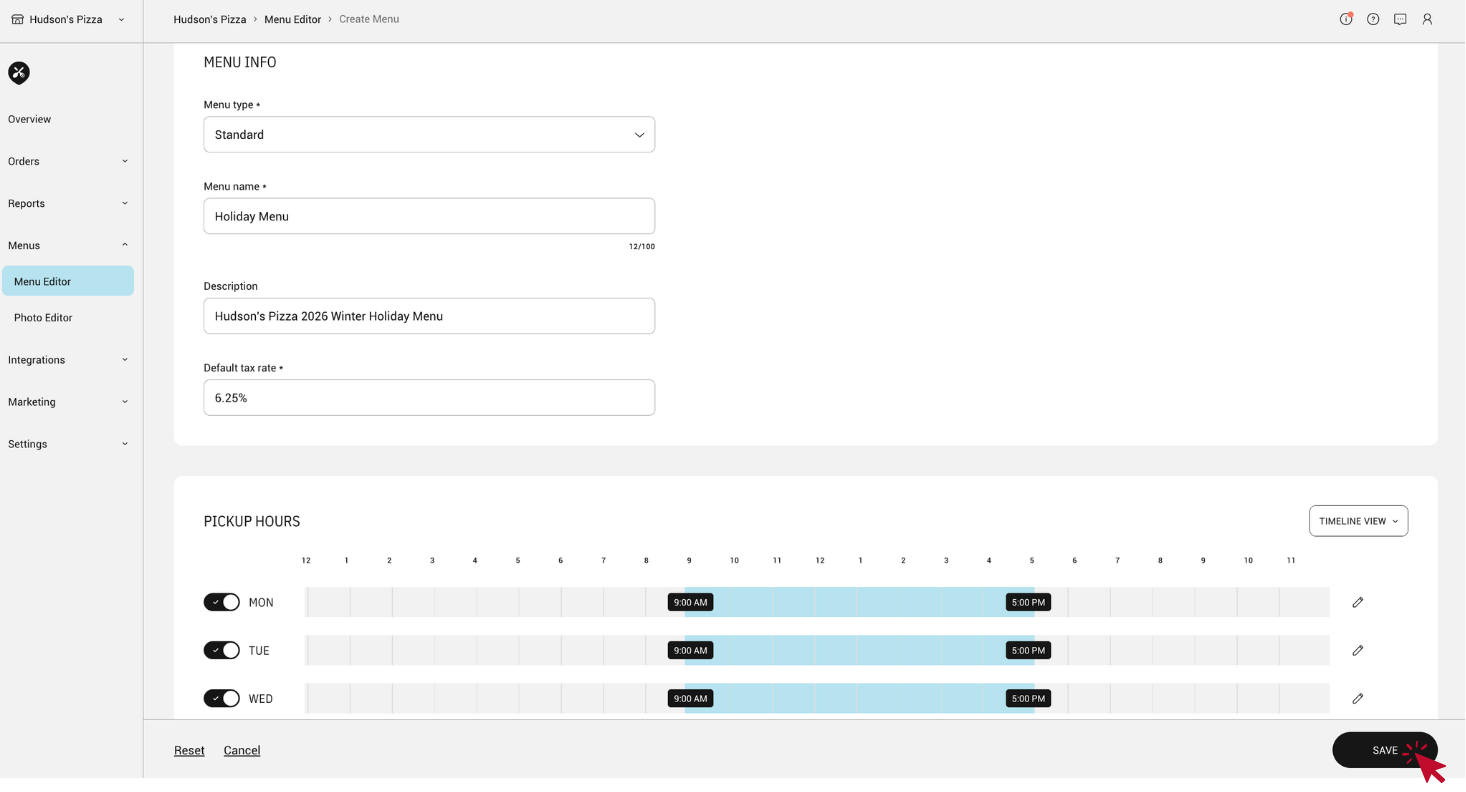
- Enter a menu name, description, default tax rate, and set your menu hours. You can always go back and change these later.
![]()
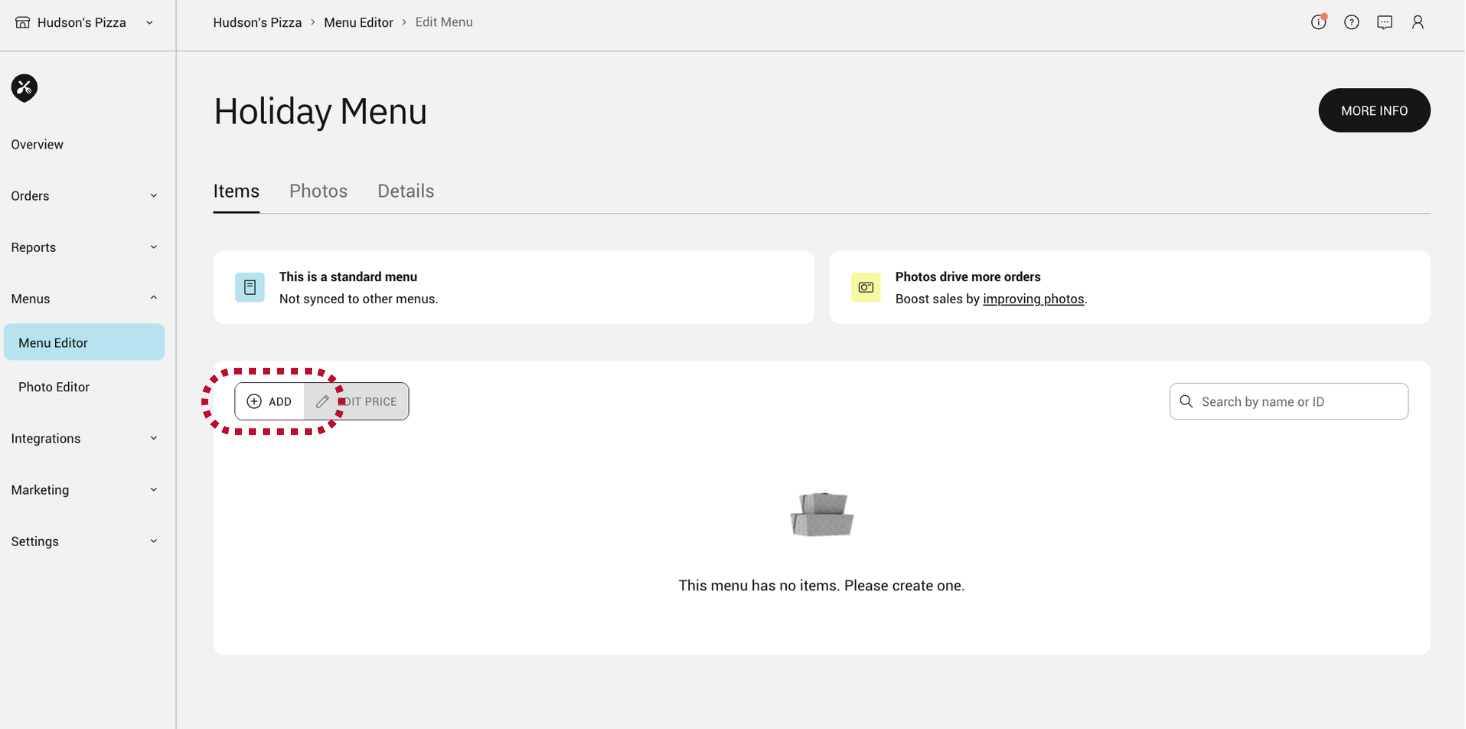
- Once you’ve created your menu, you can add categories, items, modifier groups, and modifiers.
![]()