How do I add, replace, or remove a menu photo?
Making changes to the photos on your menu is easy. Just follow the steps below.
Note: If your Menu Editor looks different, reference this article for instructions on our Legacy Menu Editor.
- Log in to your ChowNow Dashboard.
- Click on “Headquarters”, then the name of your location.
- Click on “Menus” then “Menu Editor” on the left sidebar.
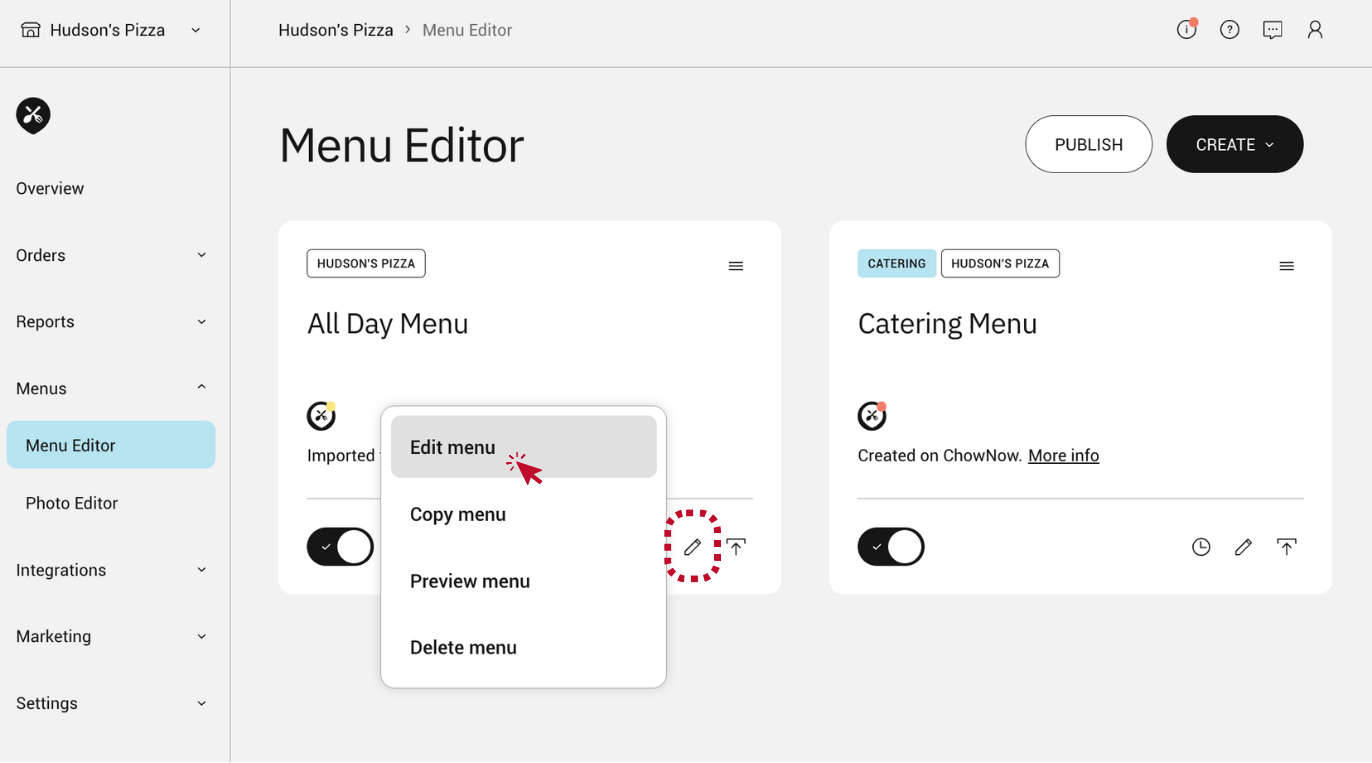
- Click the pencil icon within the menu you would like to edit, and select “Edit menu”.
![]()
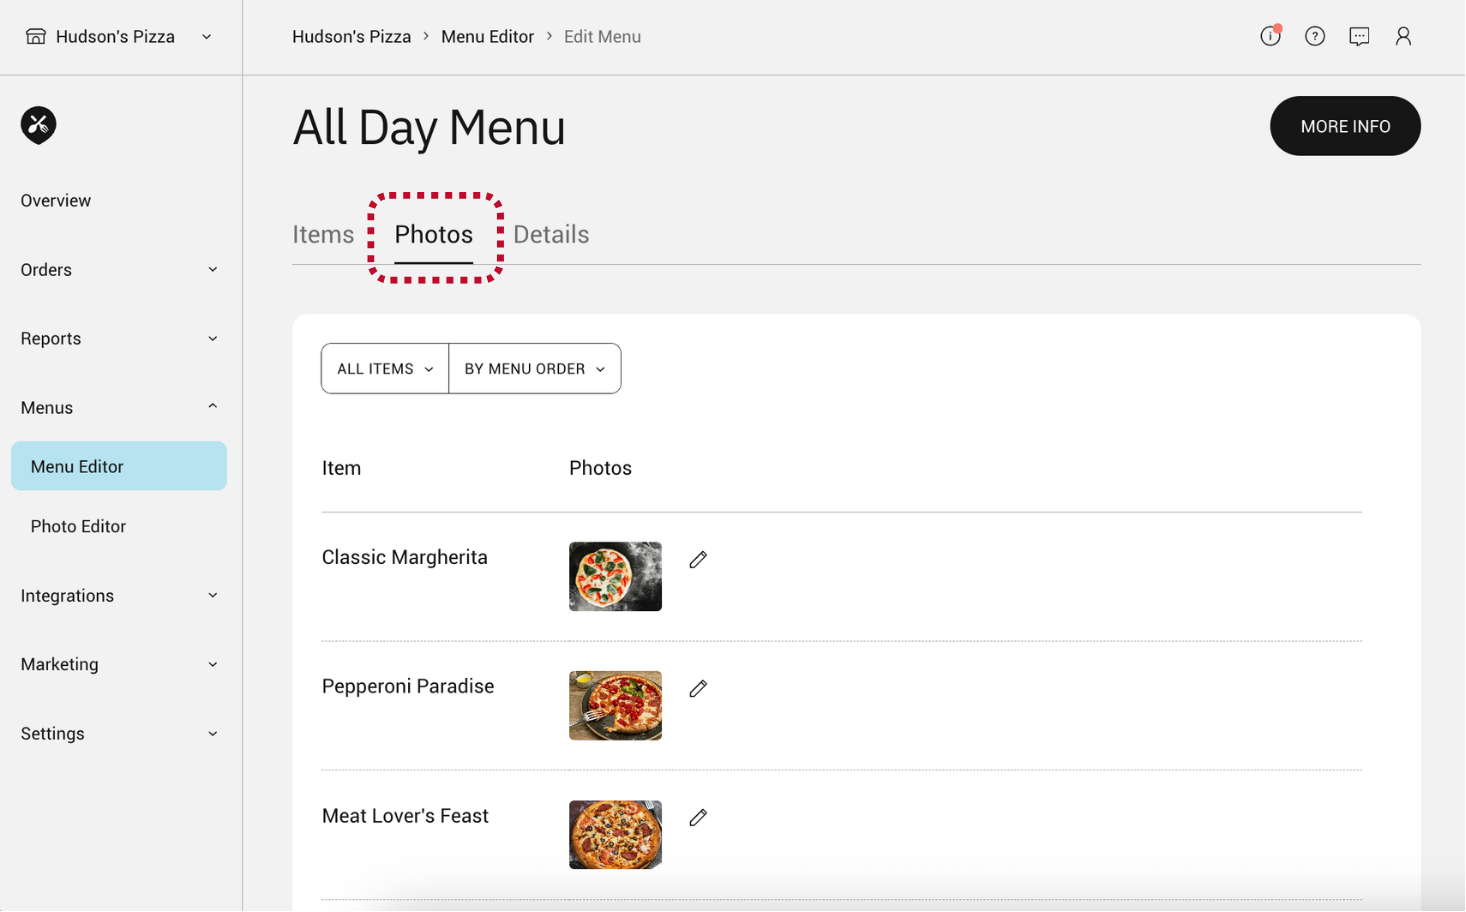
- Click into the “Photos” tab, where you can manage all photos across your menu.
![]()
NOTE: You can also manage individual photos within the “Items” tab. Click the pencil icon next to the item you want to update, and select “Edit item”.
Add or Replace a Photo
Add a Photo
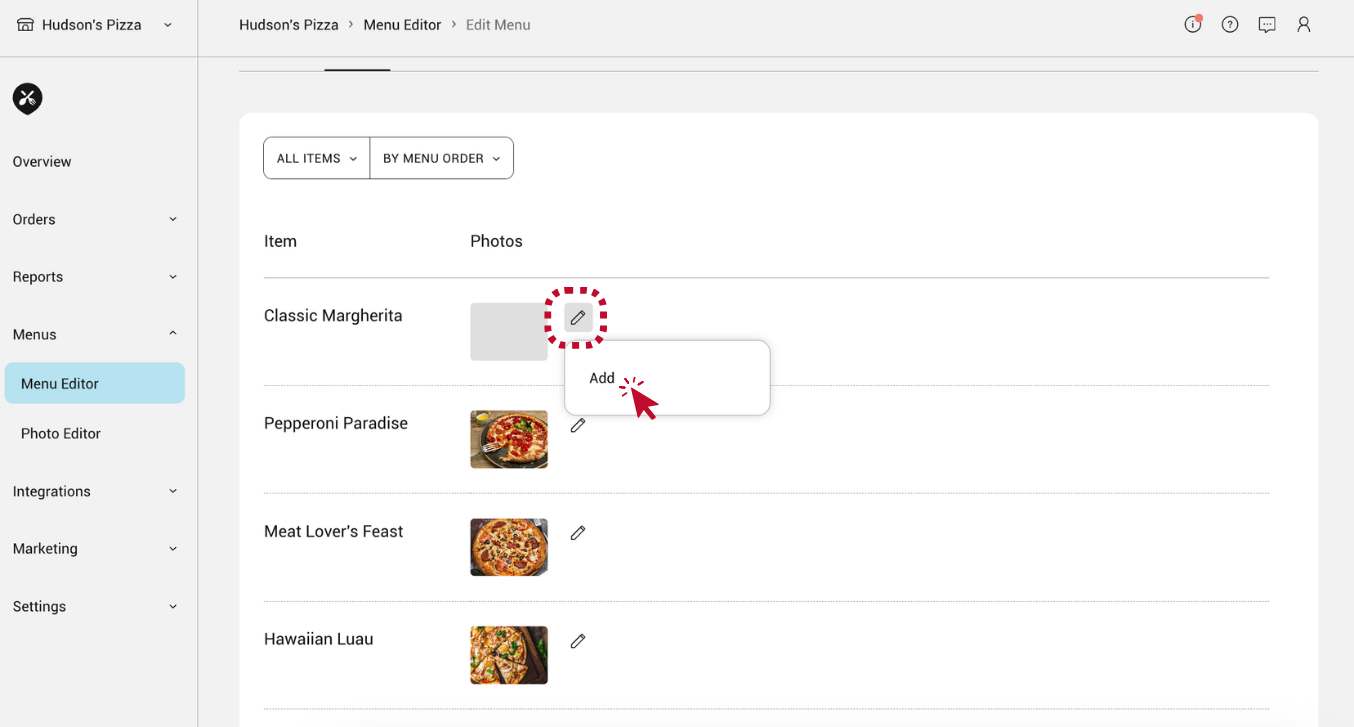
- To add a photo, click the pencil icon next to the item you want to add a photo for and select “Add”.
![]()
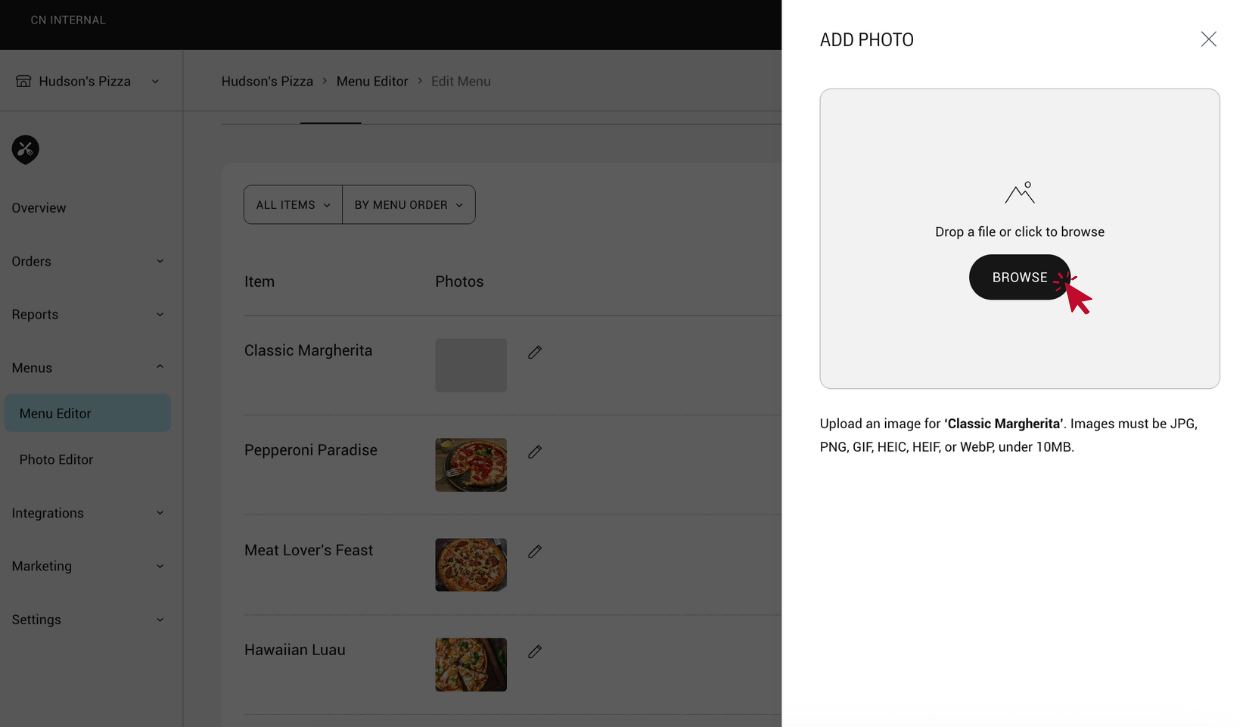
- Click “BROWSE” and select the image file you want to upload.
![]()
Replace a Photo
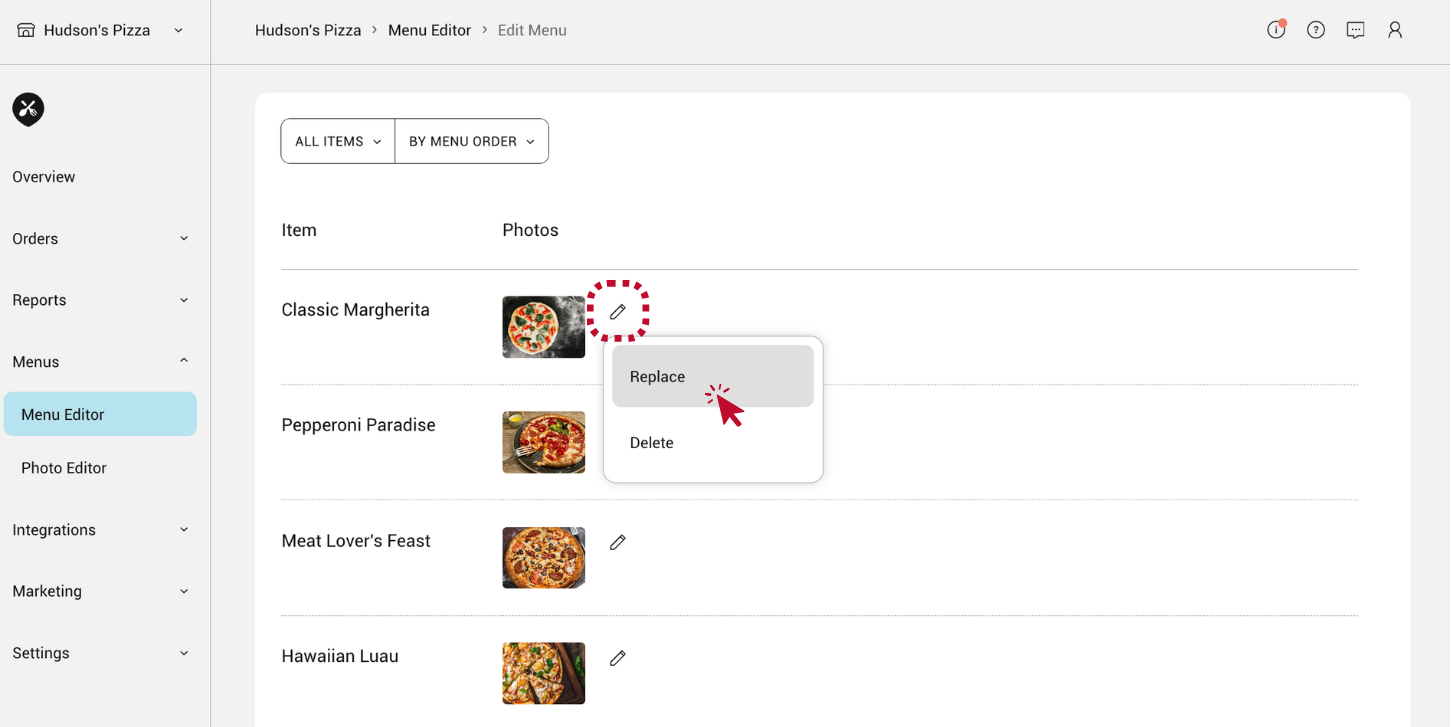
- To replace a photo, click the pencil icon next to the image you want to change and select “Replace”.
![]()
- Click “BROWSE” and select the image file you want to upload.
![]()
Edit & Save
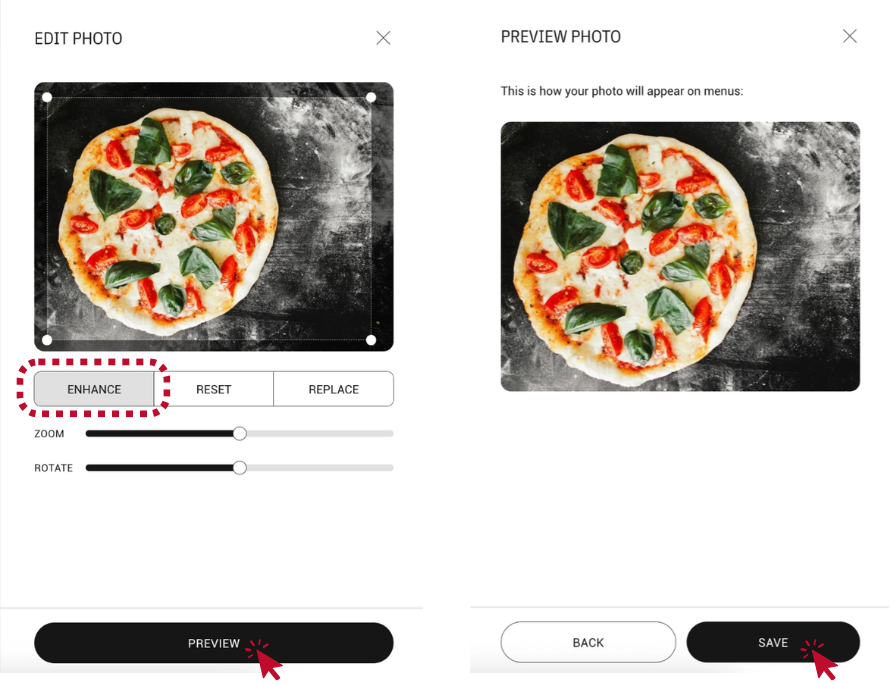
- Click “ENHANCE” to optimize the photo’s clarity and coloring with just one click.
- Adjust the crop frame, zoom, and rotation angle as preferred.
- Click “PREVIEW” to see how the photo will appear on your menu.
- Click “SAVE”.
![]()
Remove a Photo
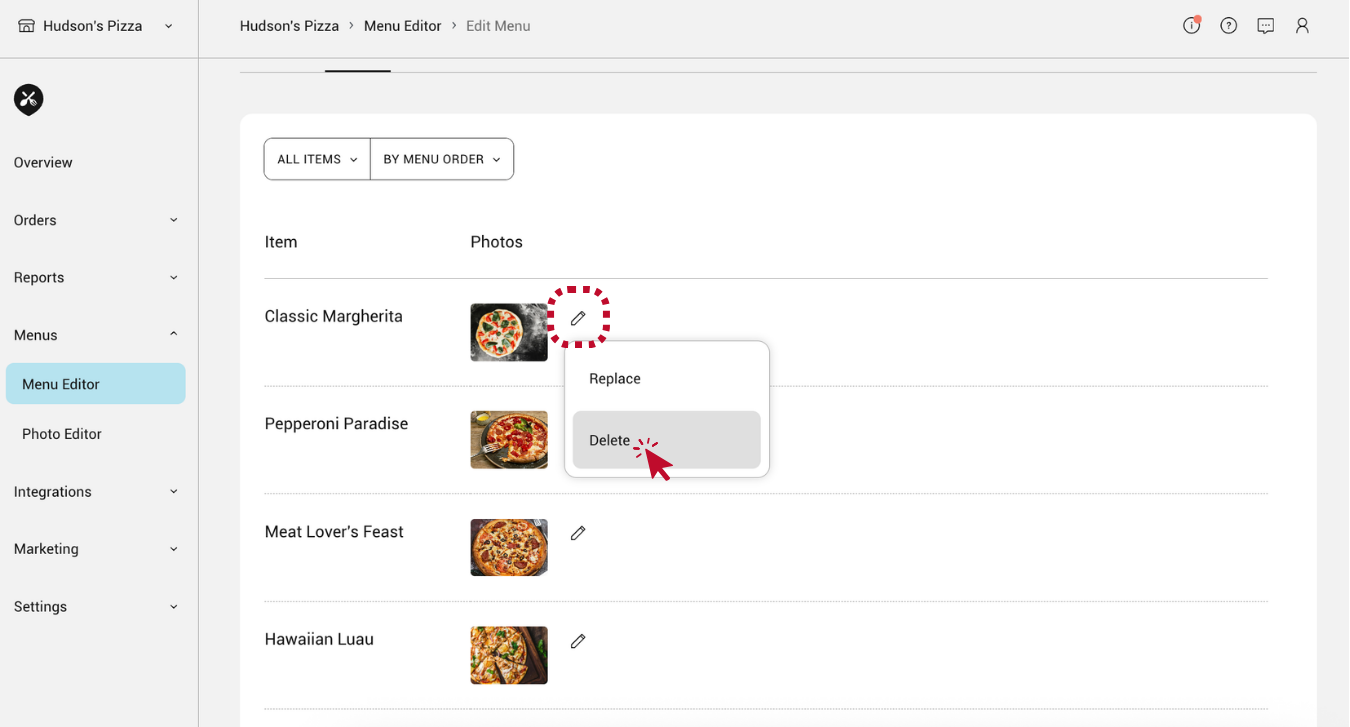
- To remove a photo, click the pencil icon next to the item you want to add a photo for and select “Delete”.
![]()
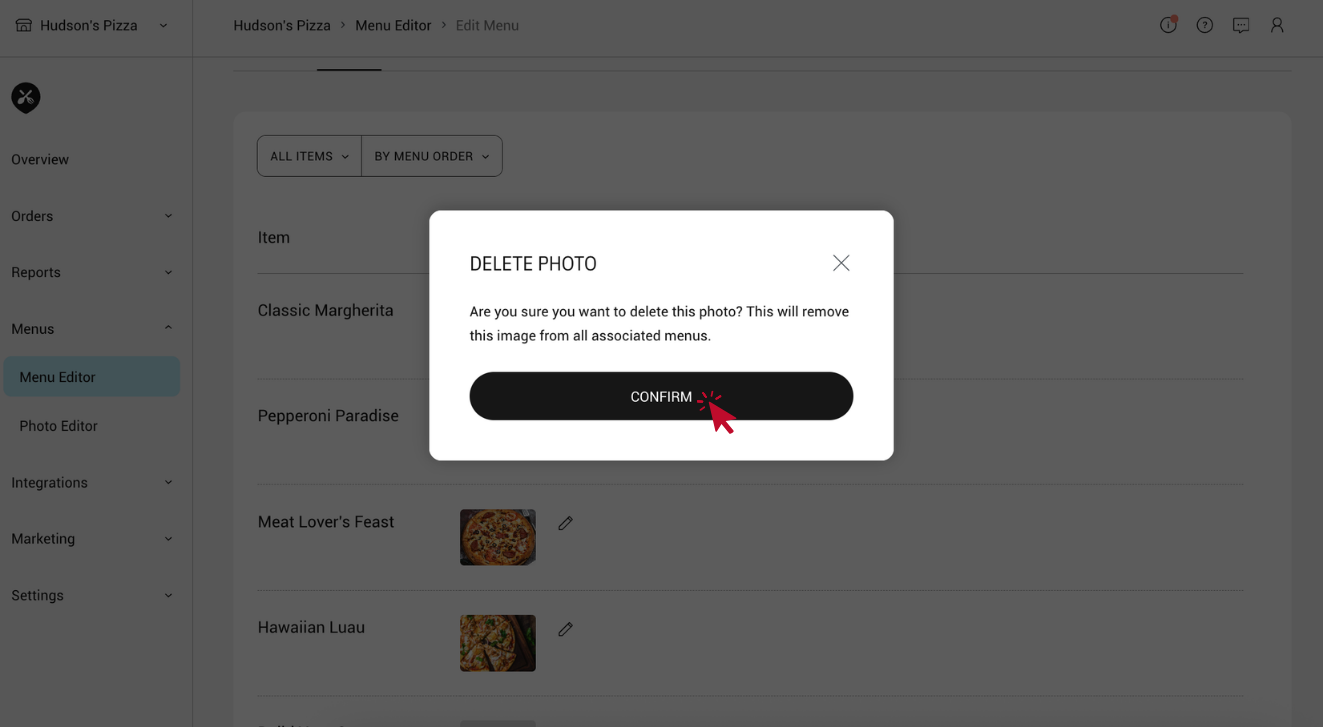
- Click “CONFIRM” to remove the image from all associated menus.
![]()