How to add or edit Modifiers
Menu modifiers give your customer a way to change or add to their order items, such as adding extra cheese, substituting for non-dairy milk, or bundling in a dessert.
- Modifier Groups consist of multiple modifier options. Modifier Groups can be used on several items – this way, you don’t need to create each individual modifier for each item.
- Nested Modifiers are used when a modifier option on your menu requires a follow-up choice, like selecting a dressing for a salad. These modifier groups are nested within another modifier.
Add a modifier to a menu item
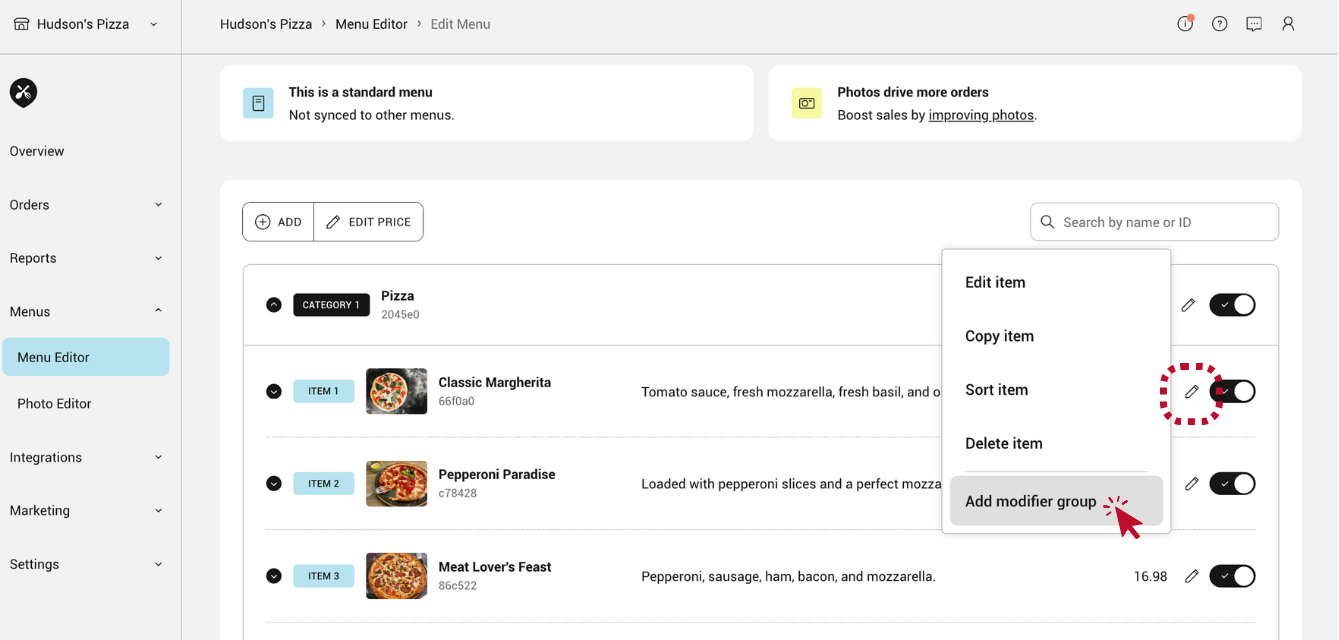
- Start by adding a modifier group to the item. In this example, we will set up crust options for the Classic Margherita pizza. To do this, click the plus sign to the right of the item details to “Add modifier group”.
![]()
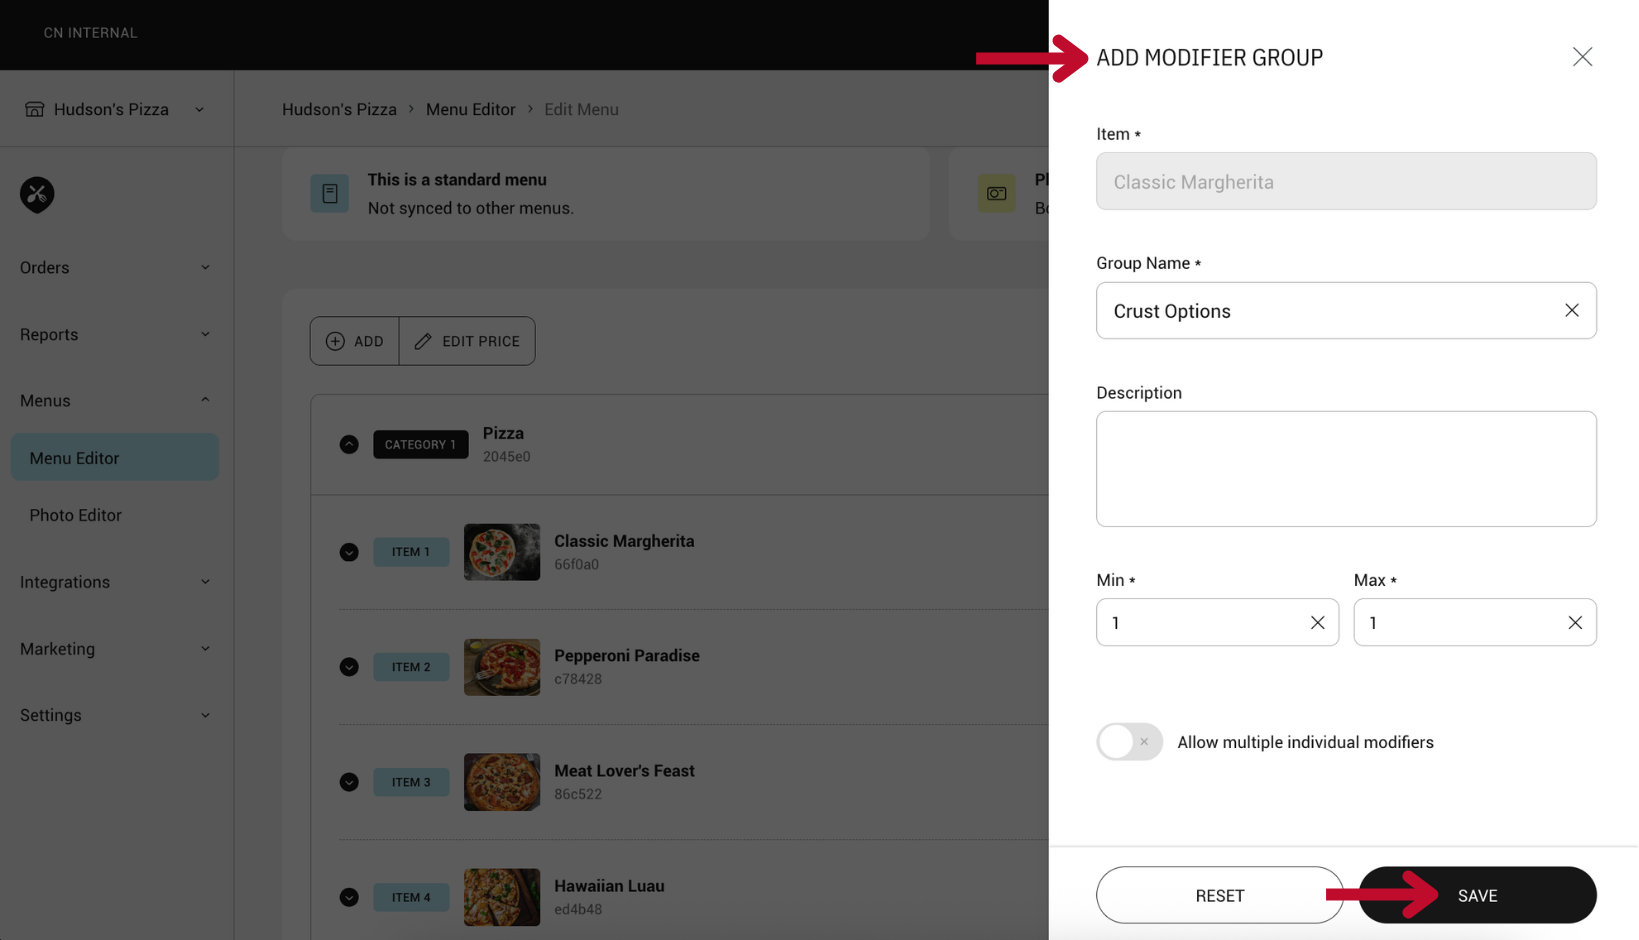
- Name your modifier group – make sure the naming is clear as this is what diners will see.
- Input the minimum and maximum number of modifiers required for a diner to select.
![]()
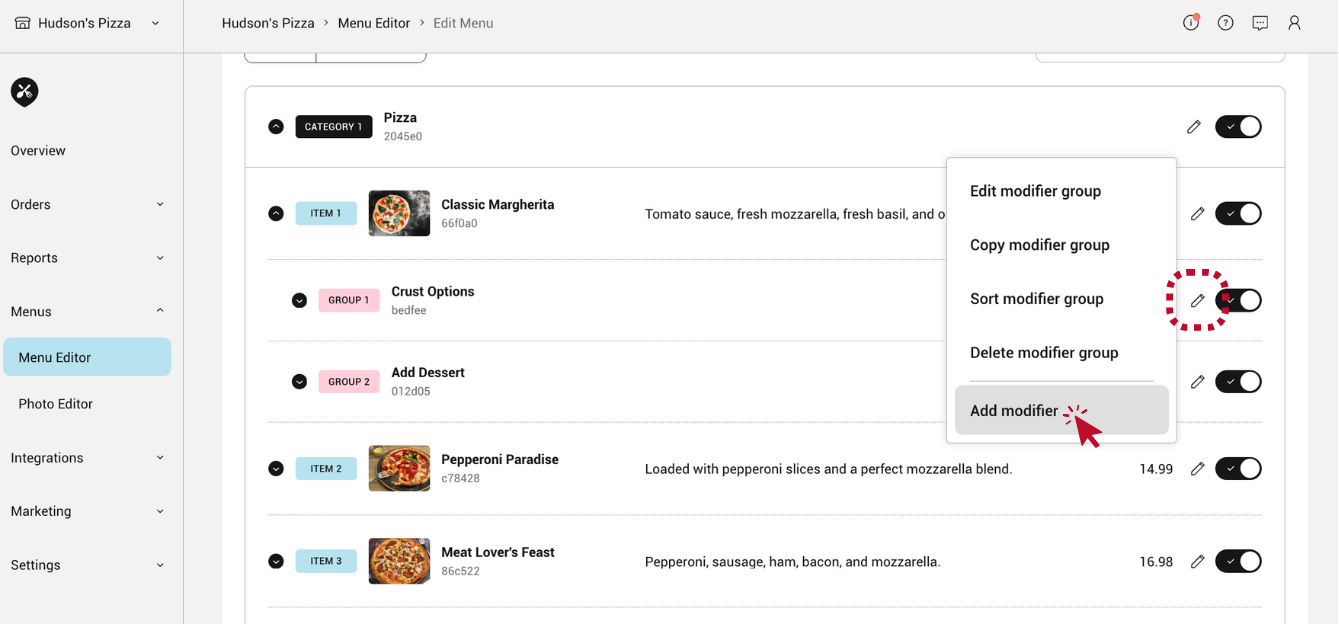
- Once the modifier group is created, add the modifier options. For example, if the group is “Crust Options”, modifier options may include “Thin Crust”, “Deep Dish”, and “Gluten Free”.
- To add a new modifier option, click the plus sign to the right of the modifier group.
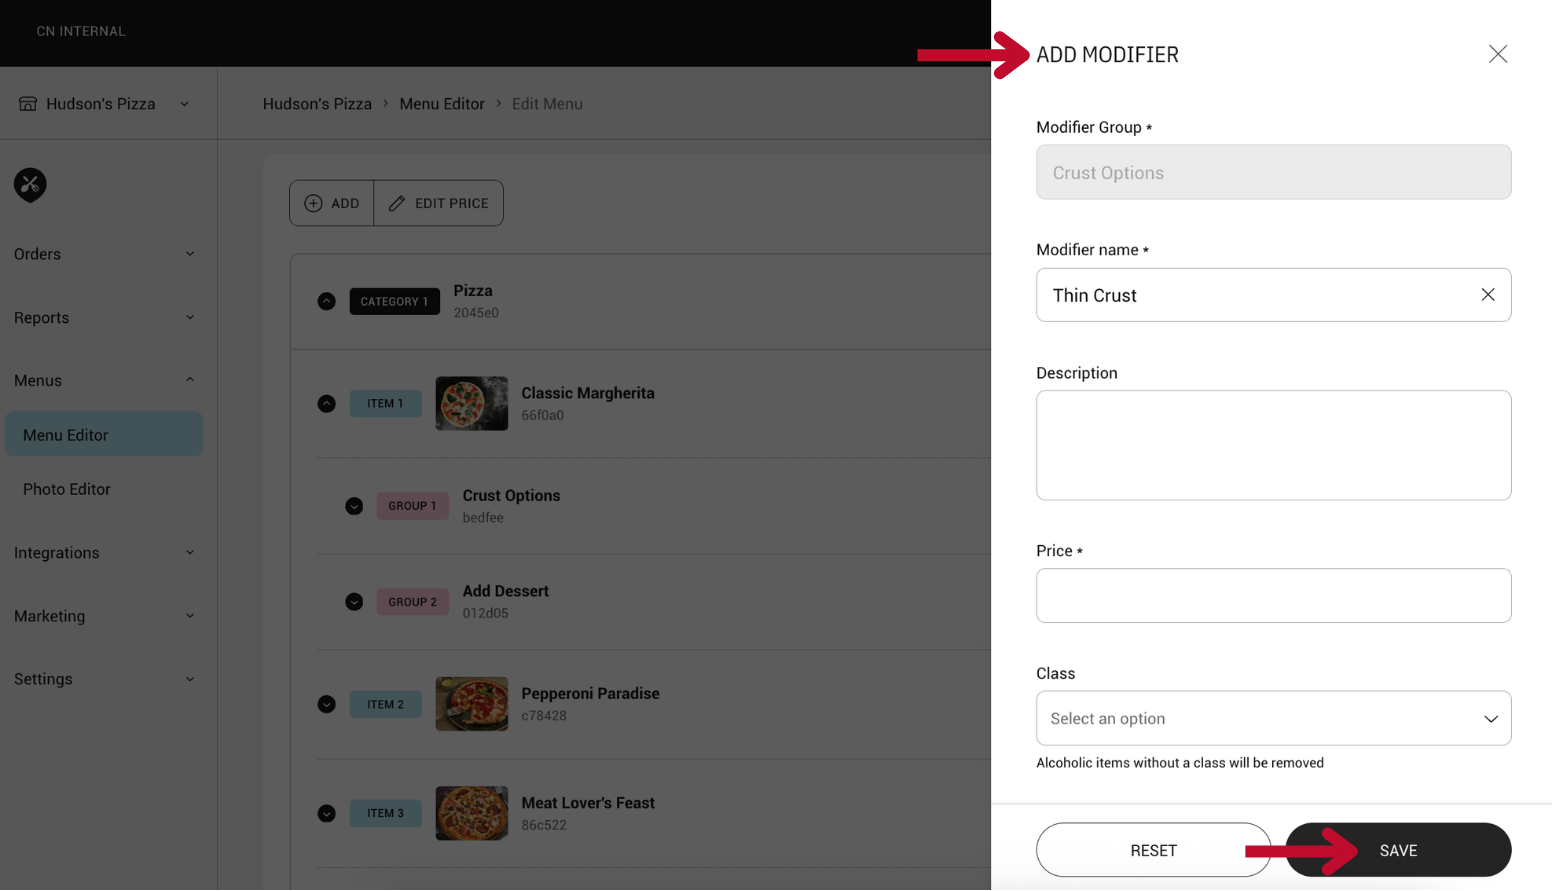
- Input the modifier name, description, price, and classification.
- Repeat this process for all modifier options within your modifier group.
- Click “SAVE”.
![]()
![]()
Add a nested modifier to a modifier group
Nested modifiers are helpful for organizing complex menu selections, like pizza customizations or build-your-own items.
- Once the main modifier group and modifier options have been created for an item, click the plus sign to the right of a modifier option and create a nested group.
- Then, click the plus sign to the right of the new nested group to add nested modifier options.
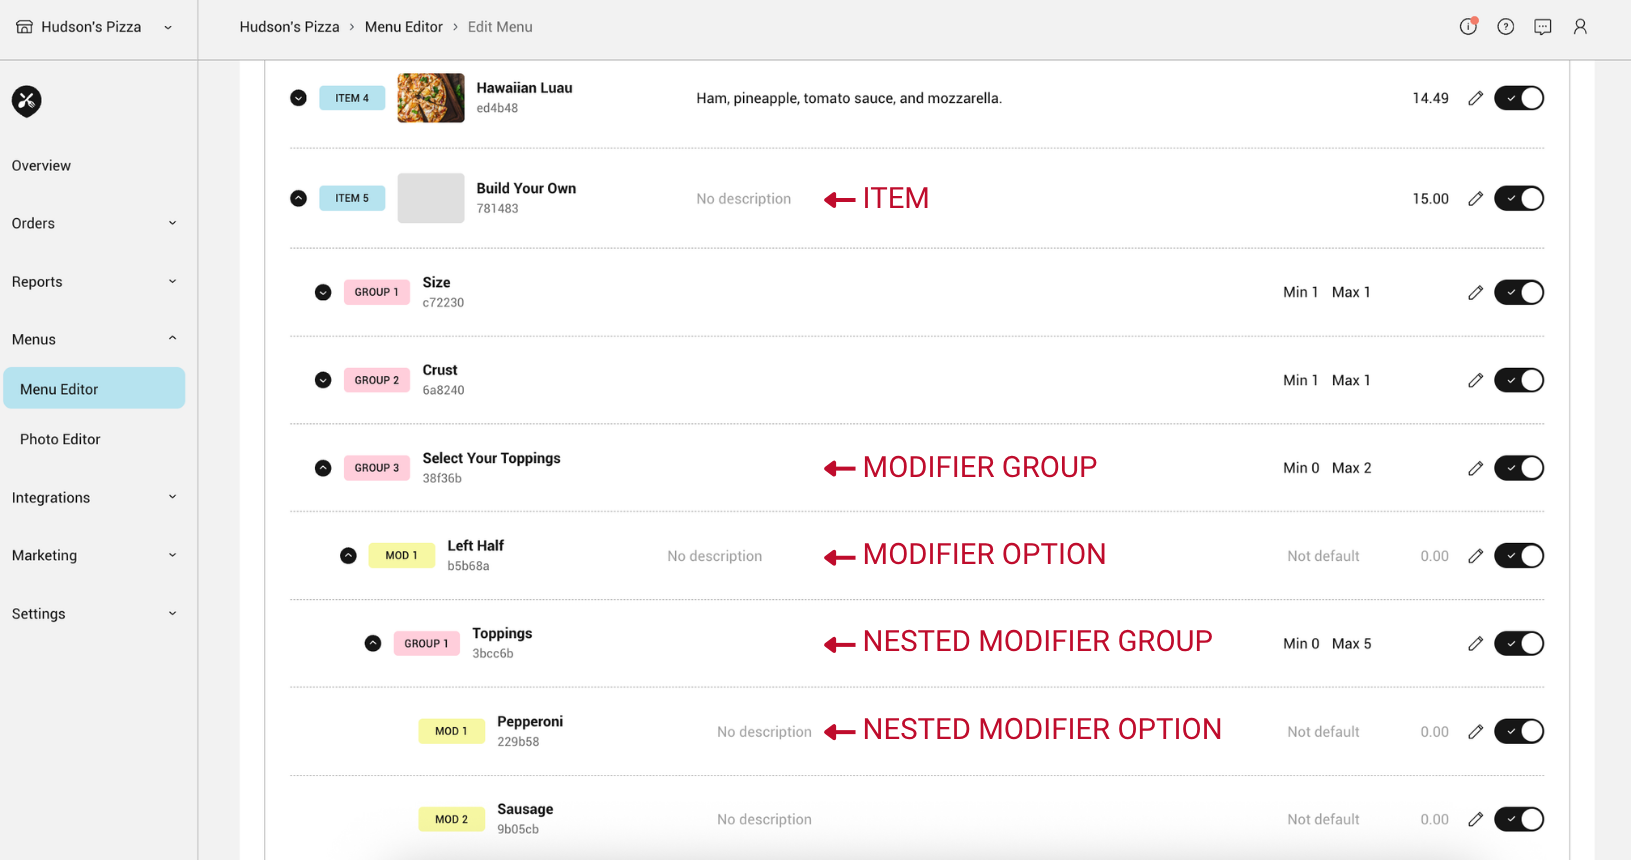
- Here’s a breakdown of the nested modifiers in the example below:
- Item: Build Your Own Pizza
- Modifier Group: Select Your Toppings
- Modifier Option: Left Half
- Nested Modifier Group: Toppings
- Nested Modifier Option: Pepperoni
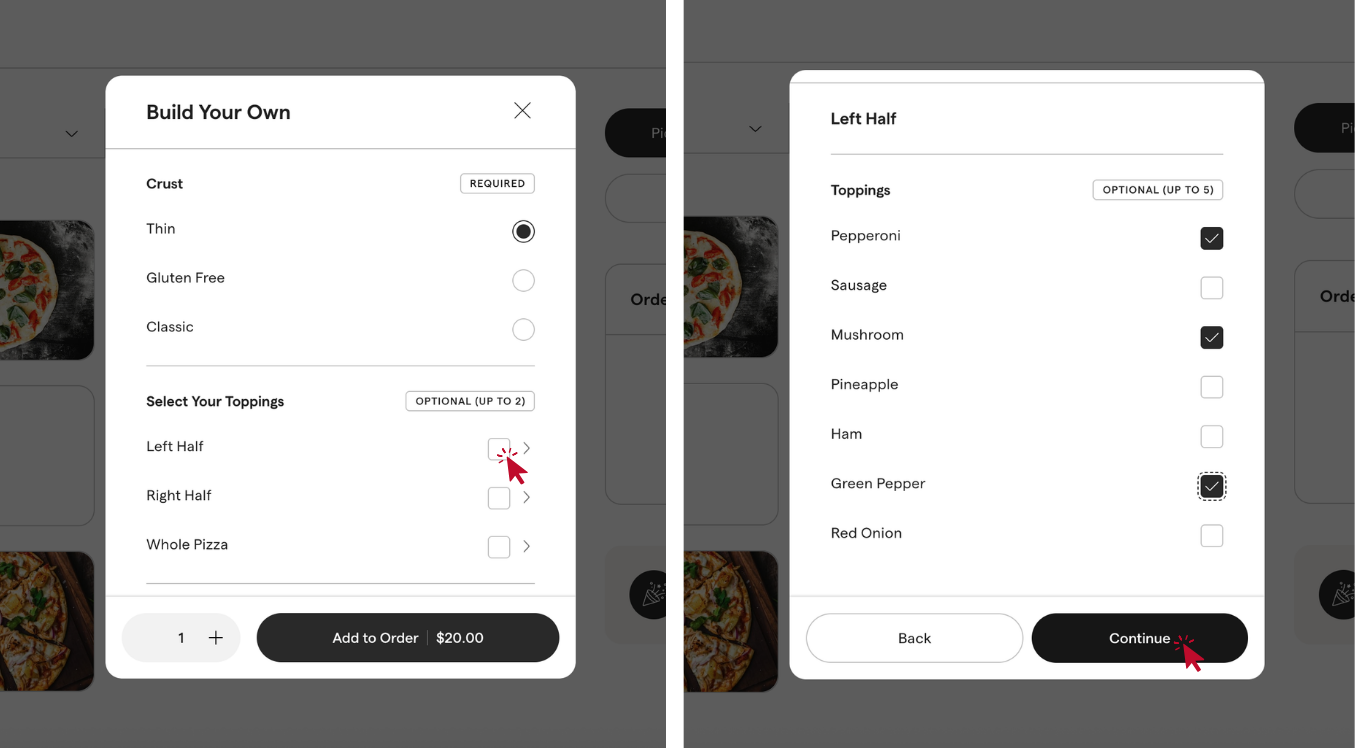
Nested modifiers on your diner-facing menu
This is how nested modifiers appear on a diner-facing menu. A diner selects the modifier option (”Left Half” in this case) and is them prompted to select individual toppings (the nested modifiers):
Manage Modifiers
Editing a modifier
- Click on the edit icon to the right of the modifier name and select “Edit modifier”.
- Adjust the modifier’s Name, Description, Price, Modifier Groups, or Classification. Note: You can have a single modifier linked to multiple modifier groups. This way, you only need to create it once!
- Click “SAVE”.
Copying a modifier
- Click on the edit icon to the right of the modifier name and select “Copy modifier”.
- Select the Target Merchant, Target Menu, Target Category, Target Main Item, and Target Modifier Group.
- Click “SAVE”.
Sorting a modifier
- Click on the edit icon to the right of your modifier name and select “Sort modifier”.
- Drag the item cards to reorder your modifiers.
- Click “SAVE”.
Enabling/Disabling a modifier
You can quickly hide a modifier from the diner facing menu across all platforms by toggling the switch next to each menu component. To re-enable, just toggle the switch back.
Deleting a modifier
- Click on the edit icon to the right of the modifier name and select “Delete modifier”.
- Click “CONFIRM”.