Menu Photos: Easy Tips for Taking & Showcasing with ChowNow

Your restaurant’s menu photos are a powerful marketing tool to attract new customers, increase ticket sizes, and keep guests coming back. At ChowNow, we’ve made it easy to add photos to your menu, so you can boost orders and showcase what makes your restaurant so special.
Let’s take a quick look at how this feature works. Then, we’ll go through some easy tips for taking appetizing menu photos of your own.
ChowNow Menu Photos
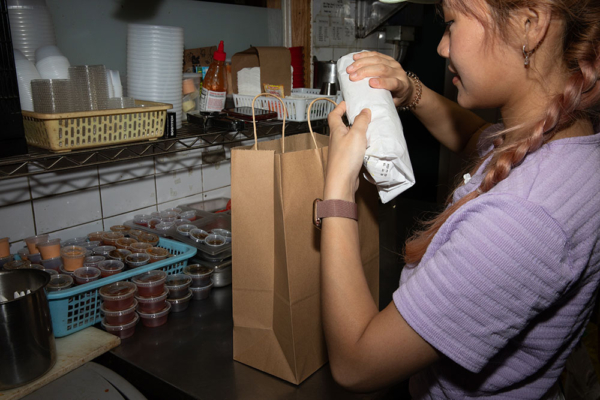
Whether you take your own photos or work with a professional, it’s simple to upload images of your dishes via the ChowNow Dashboard. Watch this video for a brief intro:
For step-by-step instructions to upload menu photos, view our Support articles here:
- How to Upload a Photo to a Menu Item
- Photo Requirements and Guidelines
- How to Remove, Edit, or Replace a Menu Photo
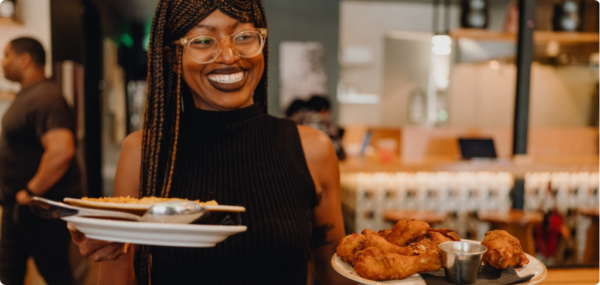
Need some pointers for photographing your food? Read on below.
Six Easy Tips for Taking Enticing Menu Photos:
1. Plan for the best lighting.
As a rule of thumb, aim for natural light and try to take your menu photos in the morning (around 10am) or afternoon (around 3pm). If you can’t get your food outside, don’t fret: shooting near a window will work too. Keep in mind that taking photos around these times will allow for softer natural lighting and will help you avoid harsh shadows. And if you can’t shoot in daylight, aim for one overhead light source so as not to wash out your food.

2. Garnish your dishes.
Think of garnishes as accessories – your menu photos will look significantly better with them. This is especially true with monochromatic dishes such as soups or sauces. A great garnish can range from parsley to an edible flower or even a piece of crusty, baked bread on the side. Dressing up your dishes adds to the wow factor of an already delicious looking menu item.
3. Pay attention to position and perspective in each menu photo.
When you’re photographing dishes for your online ordering menu, email marketing, and other practical purposes, it’s best to let your dishes speak for themselves.
While it’s fun to experiment with elaborate compositions and uncommon angles, that type of photography is better for more casual media, like Instagram. Plus, it’s smart to perfect fundamental food photography skills before getting more artistic. Your goal is to clearly depict and showcase various menu items.
Here are some tips:
- Center the item in frame while leaving space around it.
- Stick to the following angles: overhead, straight-on, and low-angled.
- To avoid distortion, do not tilt the camera sideways while shooting.

4. Be realistic.
There’s nothing worse for a customer than being served a meal that looks nothing like the menu photo. While it’s important to take a quality photograph of the menu item, it’s also important that it’s a realistic portrayal of what’s placed in front of the customer. Restaurants make the mistake of featuring elaborate photos of dishes in an effort to entice the customer to order, but this tactic can backfire if the real dish falls short.
5. Edit for the best results.
It’s cheaper and easier than ever to own an editing program for touching up photos. Generally, menu photos should be colorful, bright, and sharp. For an easy-to-use phone app, try VSCO. If you want more control, check out Adobe Lightroom for PC or Mac, which offers a one-week free trial and useful tutorial videos to help you get started.
Use a light touch to clean up your images without overdoing it. A good rule of thumb if you aren’t sure where to start editing: boost vibrance, lift any dark shadows, and sharpen your image by increasing clarity and/or contrast. Avoid extreme filters that distract customers and significantly alter the look of your food.
Don’t worry—you’ll be a pro in no time.

6. Know your camera
If you’re limited to a camera phone, don’t sweat it. Built-in cameras are constantly improving and you’ll still be able to take a professional-looking photo with them, no expensive equipment needed.
Follow the steps above (paying special attention to your lighting and angles!) and make sure your phone is set to capture the highest resolution image possible .
For iPhone users, that means making sure your camera is set to “HDR”, which can be turned on at the top of your phone screen in the camera mode. If you have an iPhone X or newer, you can also use Portrait Mode to capture enticing details and really highlight a single dish.
Not a ChowNow partner yet? Then it’s time to showcase your food and brand with your own commission-free online ordering system—and leave phone orders and delivery commissions to the amateurs.
ChowNow will build your restaurant its own branded online ordering, complete with ordering apps for iPhone and Android, email and print marketing, strategy consultations, and much, much more.
Schedule a quick demo call to get started.